
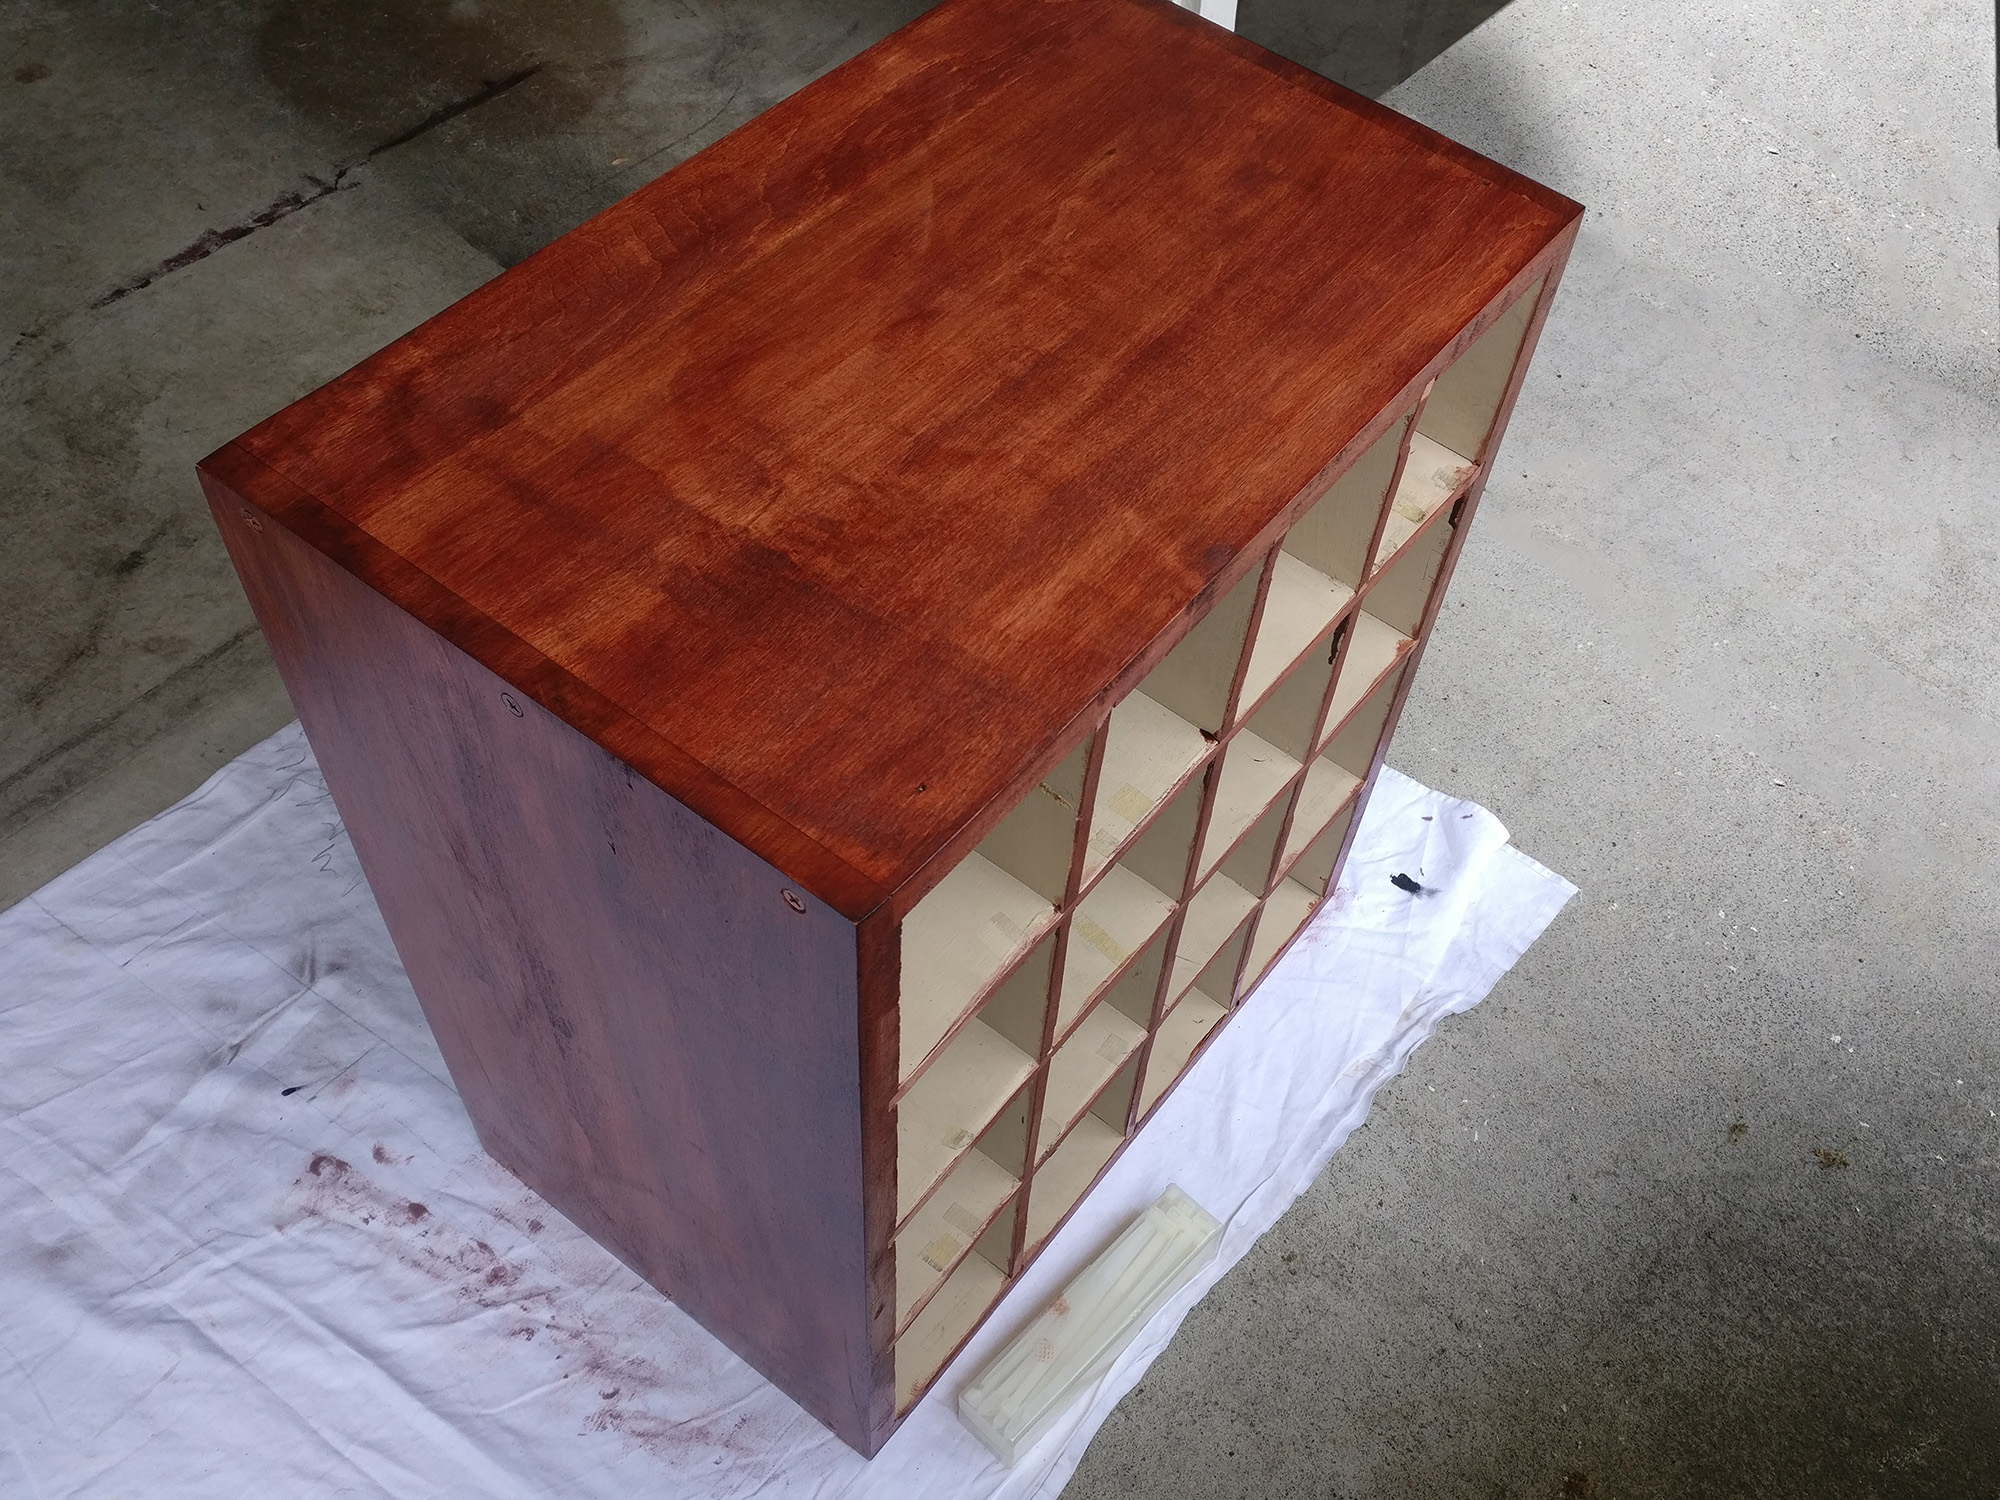
Months ago, when Tarah and I were visiting Mike and Liz Poor over in Port Townsend, we visited an antique shop. I typically pick through old cookware looking for cast iron to re-season or have a look at old pocketknives while my wife seeks out stemware that matches our pattern, because having extra goblets and cordial glasses always comes in handy. However, I never would have expected to make the discovery which I did that afternoon. Way down in the basement, amid other unloved items, was an old US Postal Service mailbox. I do not mean a blue collection box. I mean a segment of what were once a series of many individual boxes all along the wall in a town’s Post Office.

It was marked as $80 and the woman working there stated that she “though it had keys” but this turned out to simply be a huge jar of unmarked and well-worn keys that were mostly worthless. It would take me forever to decipher which keys serviced what doors… and even then there were bound to be doors that couldn’t open. The box itself had been subject to years of use and at some point became the victim of a very unfortunate paint job. Still… I knew I had to have it and almost instantly had an idea for a project. After negotiating down to $60 we managed to get this heavy beast up the stairs and out to my truck. And there you see it, sitting in our basement… where it remained for a time.
Very fortunately, the unit had no back (after all,the rear side of a box like this would normally face into a back room at the Post Office so that staff could slip mail into each cubby hole for the recipients) and I was able to reach through and manually trigger the spring-loaded door releases. So I could open each flap and inspect the inside. The mailboxes would at one time have been equipped with Federal Equipment Company “Grecian Style” combination locks (the embossed “star” pattern on each metal door features alphabet letters arranged around in a circle which were used for dialing the combination) but those locks had been retro-fitted at some point with keyed locks. I removed one cylinder for closer inspection.

I took off the door, as well, while I was at it.


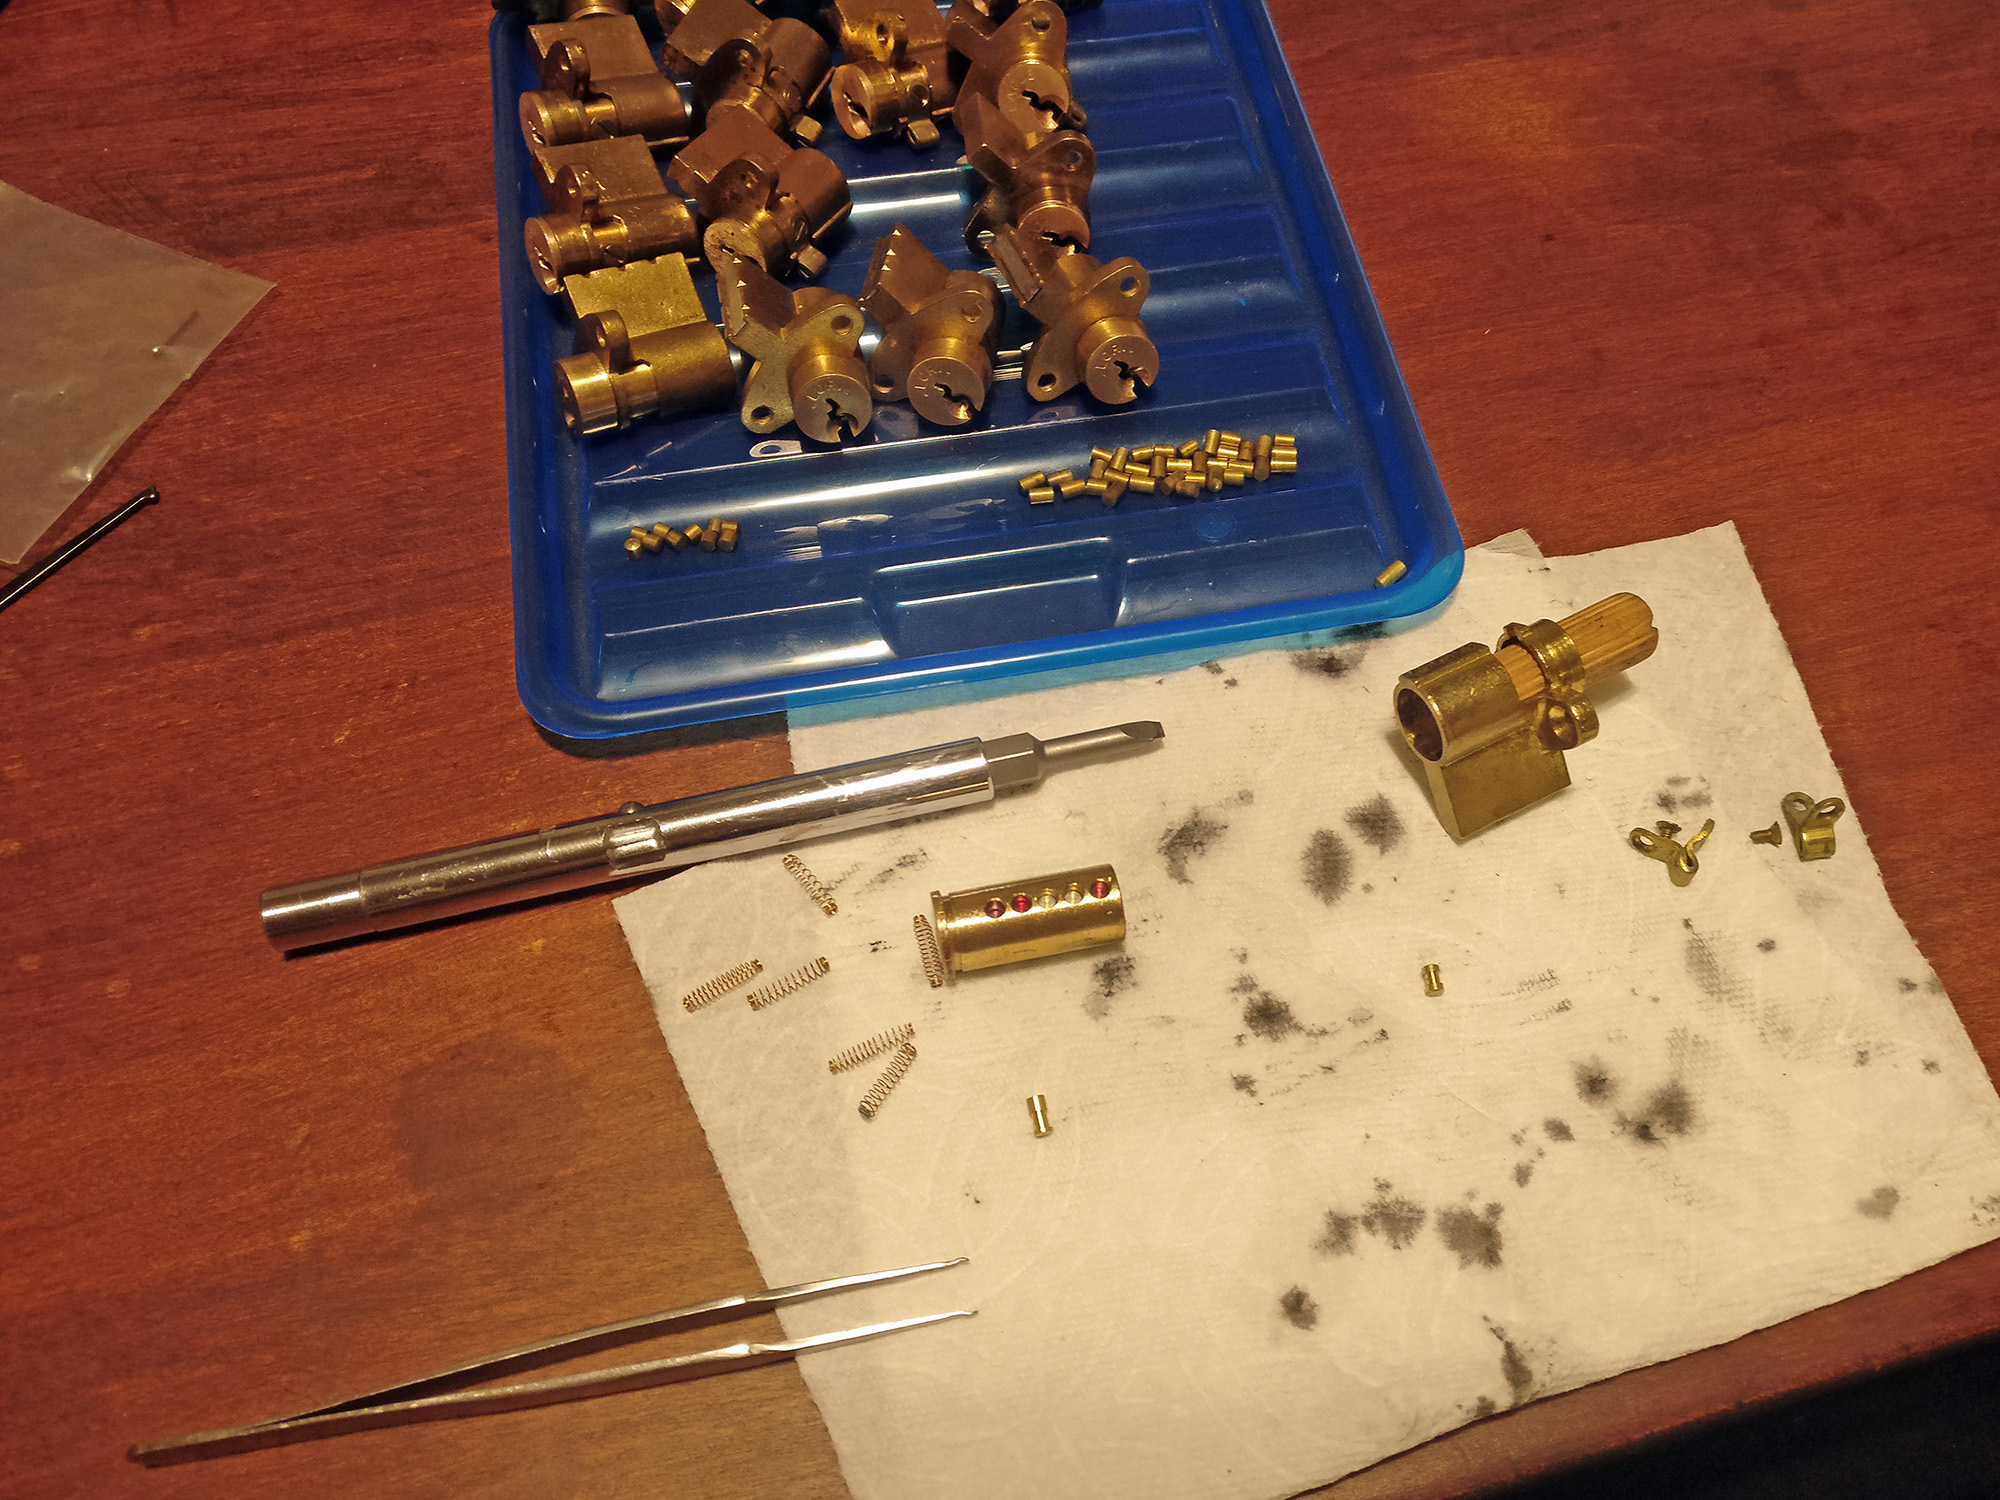
I set most of the parts aside at first, because I wanted to focus on the lock. The idea I had in my head involved re-pinning and rebuilding these locks for a contest. Now, while contest locks don’t necessarily need working keys, I knew I’d need fresh keys if I wanted to use this box in day-to-day life (and also having blanks around would make disassembly easier)
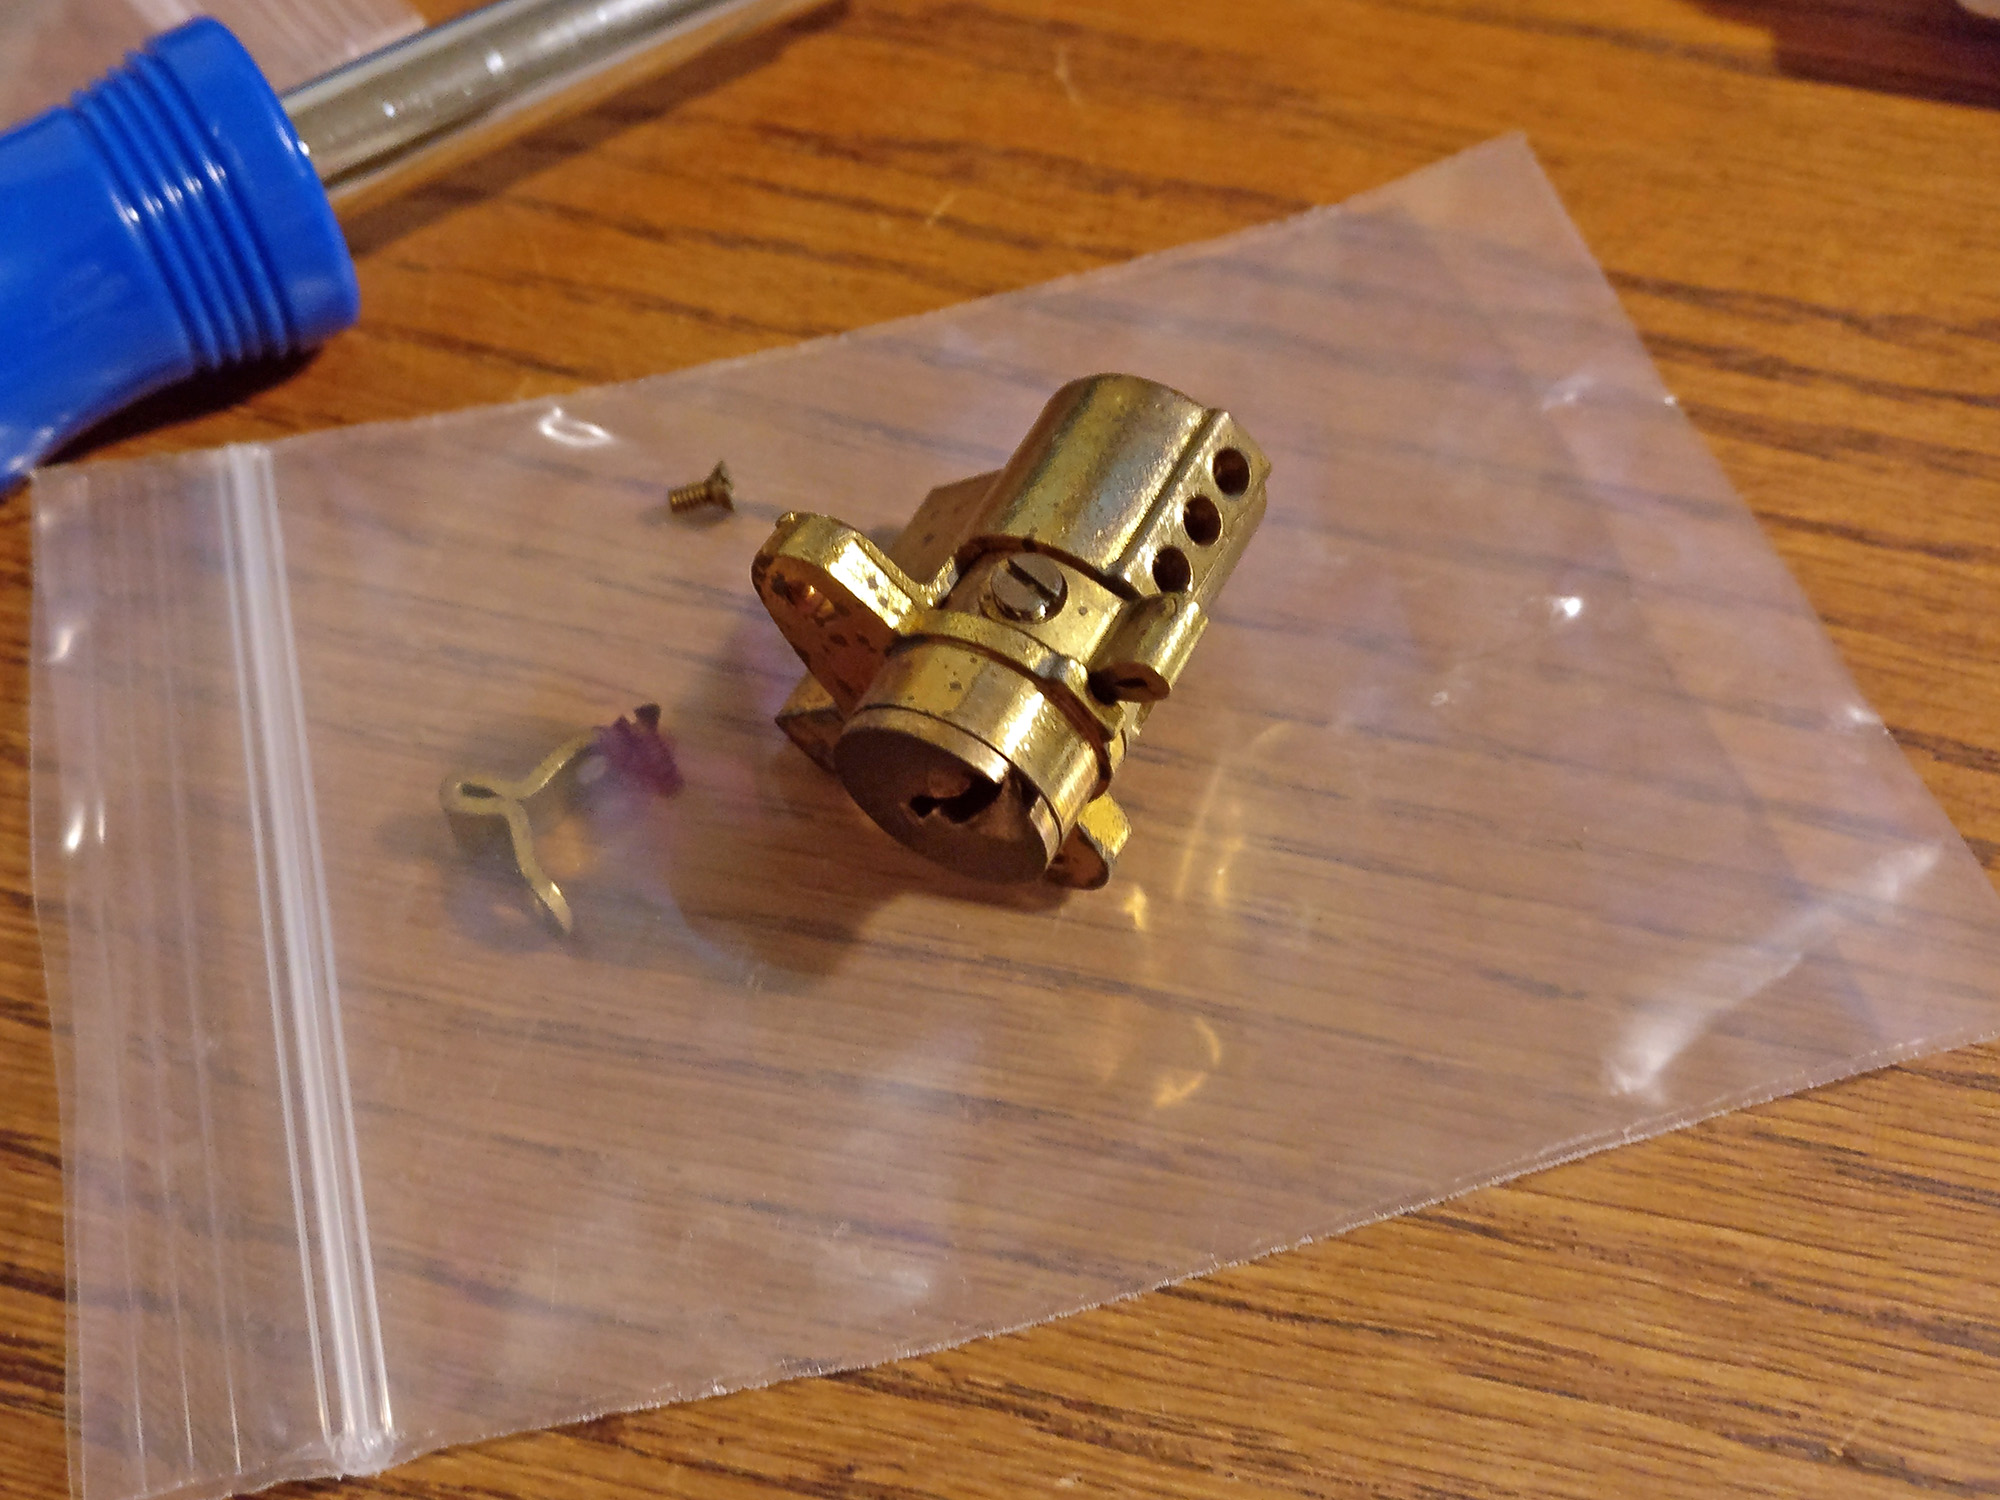
These lock cylinders feature a small downward-protruding cam (which is affixed mid-cylinder as opposed to out at the tail) to engage the door release. They also feature a rather unique keyway. It looked almost exactly like a classic Yale 8 keyway… but something didn’t seem right. I grabbed a Yale blank and it fit… but only if I inserted the key in from the tail side! Yes… just as I suspected, these locks used what was once a famous key: the “Reverse Yale”
There are threads on some lockpicking forums about this key, and how the blanks are ostensibly very restricted. According to Knowledgeable Internet Persons™ it’s a Super DoublePlus Bad Crime to possess such keys and it is not easy to source blanks. I wasn’t going to let a little thing like alleged Federal regulations stop me, though. 😉
With some very appreciated help from fellow TOOOL member and noted antique lock restorer Nite0wl, we started looking through key references.

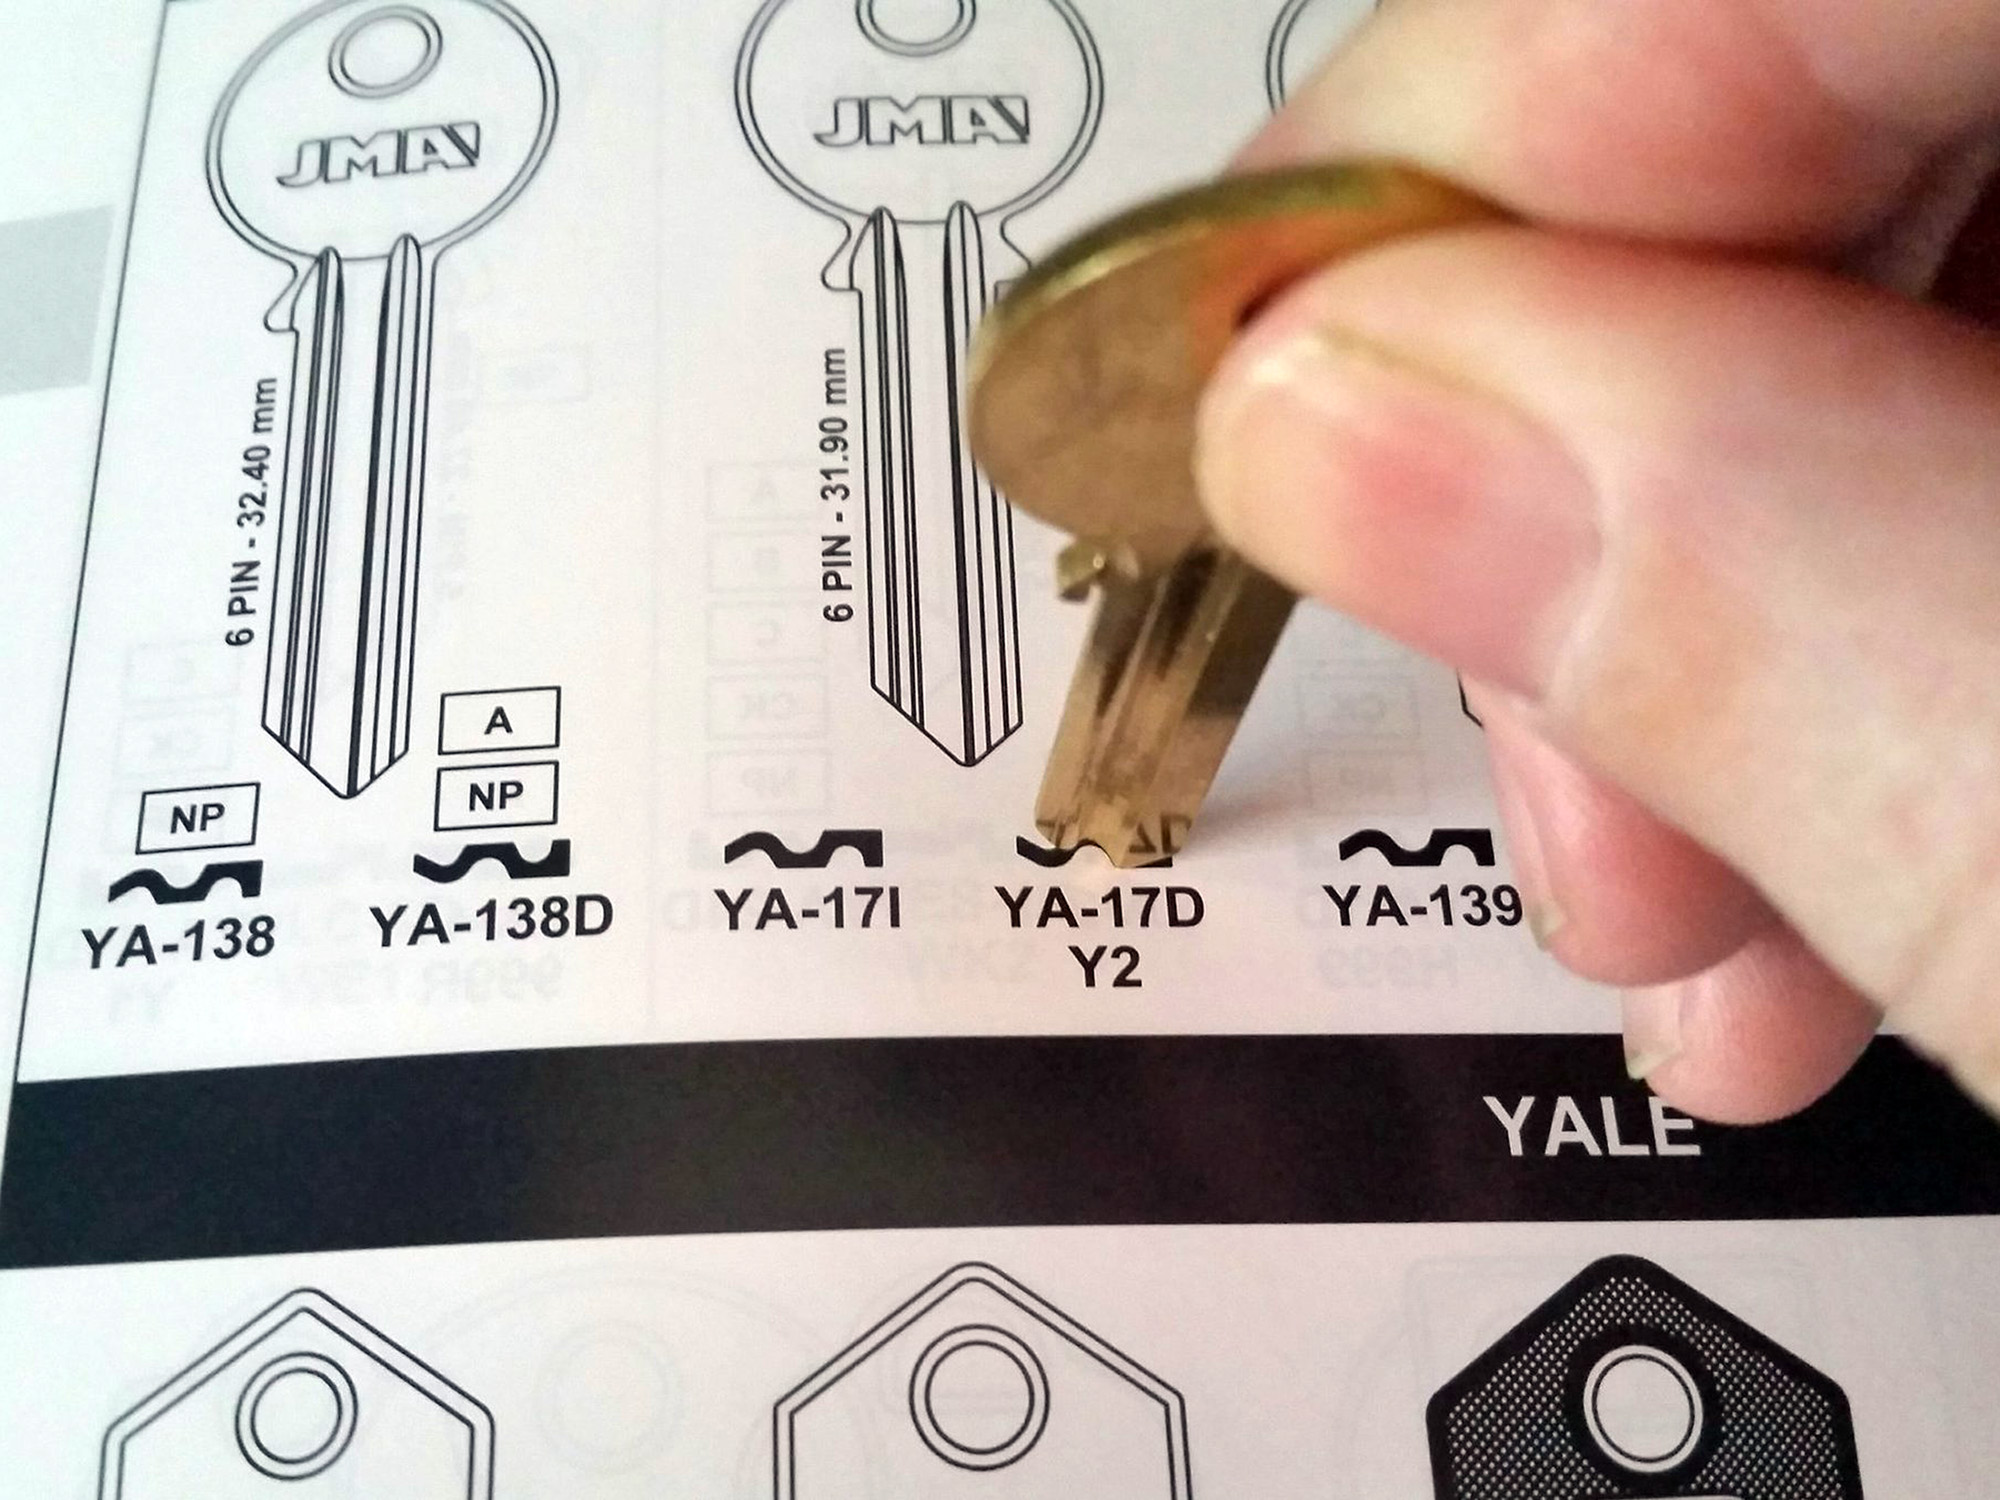
I measured a series of assorted conventional Yale keys I had in my shop and tried to determine exactly what keys might work. While US companies like Ilco may defer to our regulations, foreign suppliers like JMA and Jet have no such compunction.

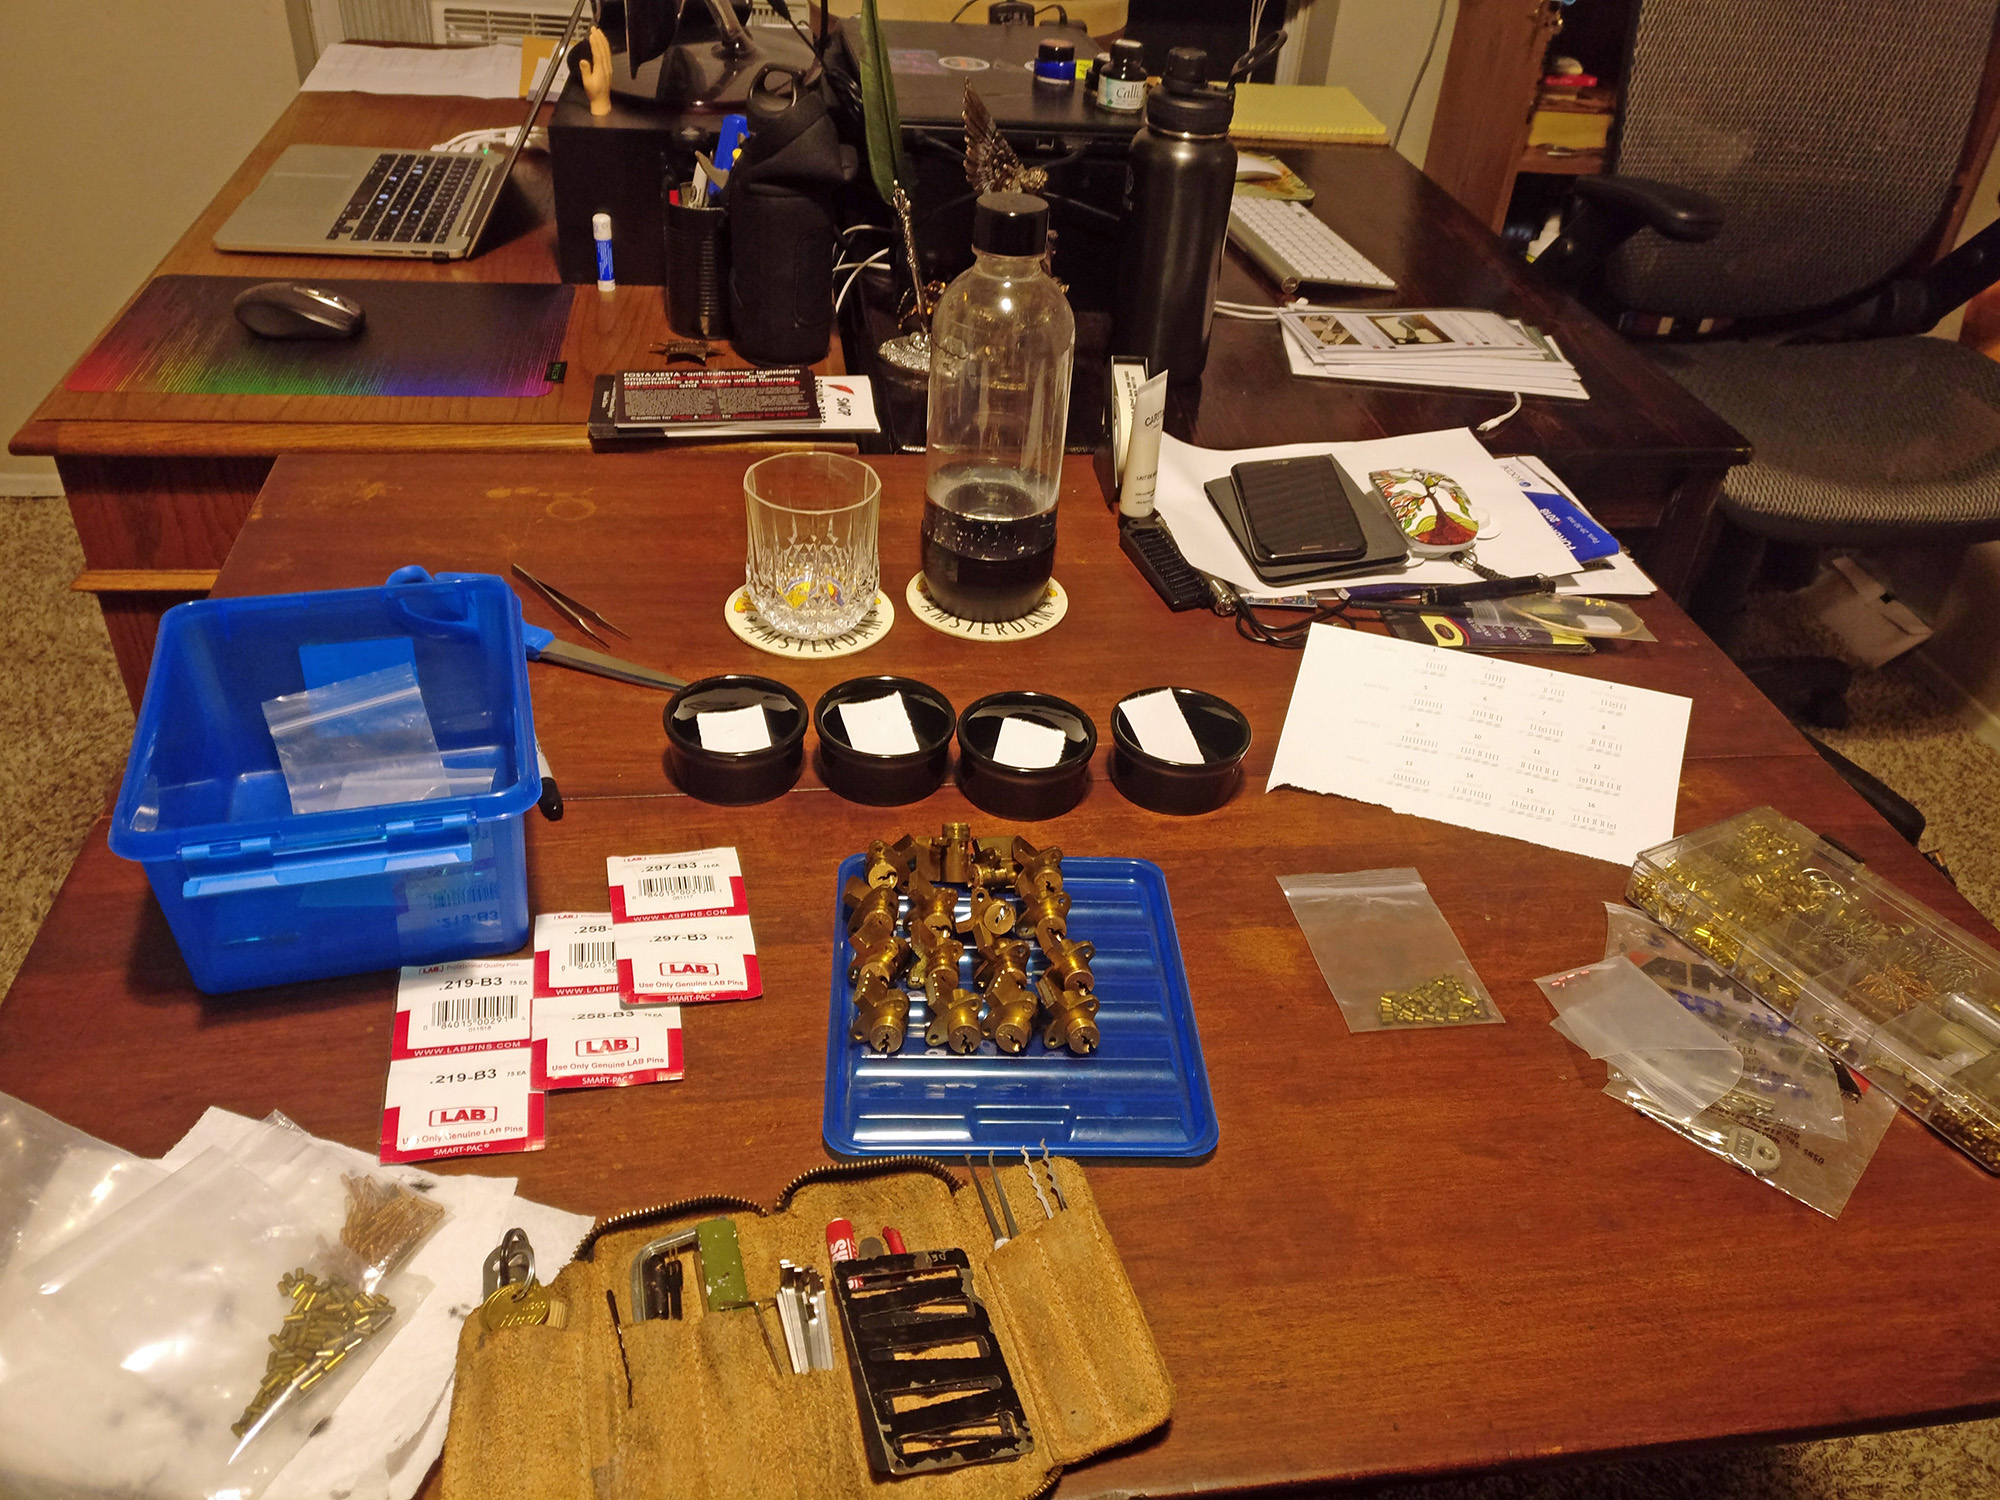
I found two likely candidates and ordered them, then created a keying chart to achieve the results I had in mind. I checked my LAB pinning kit and noticed some of the trays were a little low on quantity… so I also ordered some replacement pins. A few days later, I was ready to take the next steps.
As I had awaited the key blanks and pins, I took a shot at picking some of the locks on the mailbox. While a number of them would open, many were really janky due to age. And the Yale keyway is close enough to paracentric that it’s not a trivial task to pick. I didn’t find the idea of manipulating sixteen of these locks in a row appealing. Thankfully… those who have been in our classes before know that we advocate rear-side shimming with the use of thin slips of metal and a blank to ease disassembly.

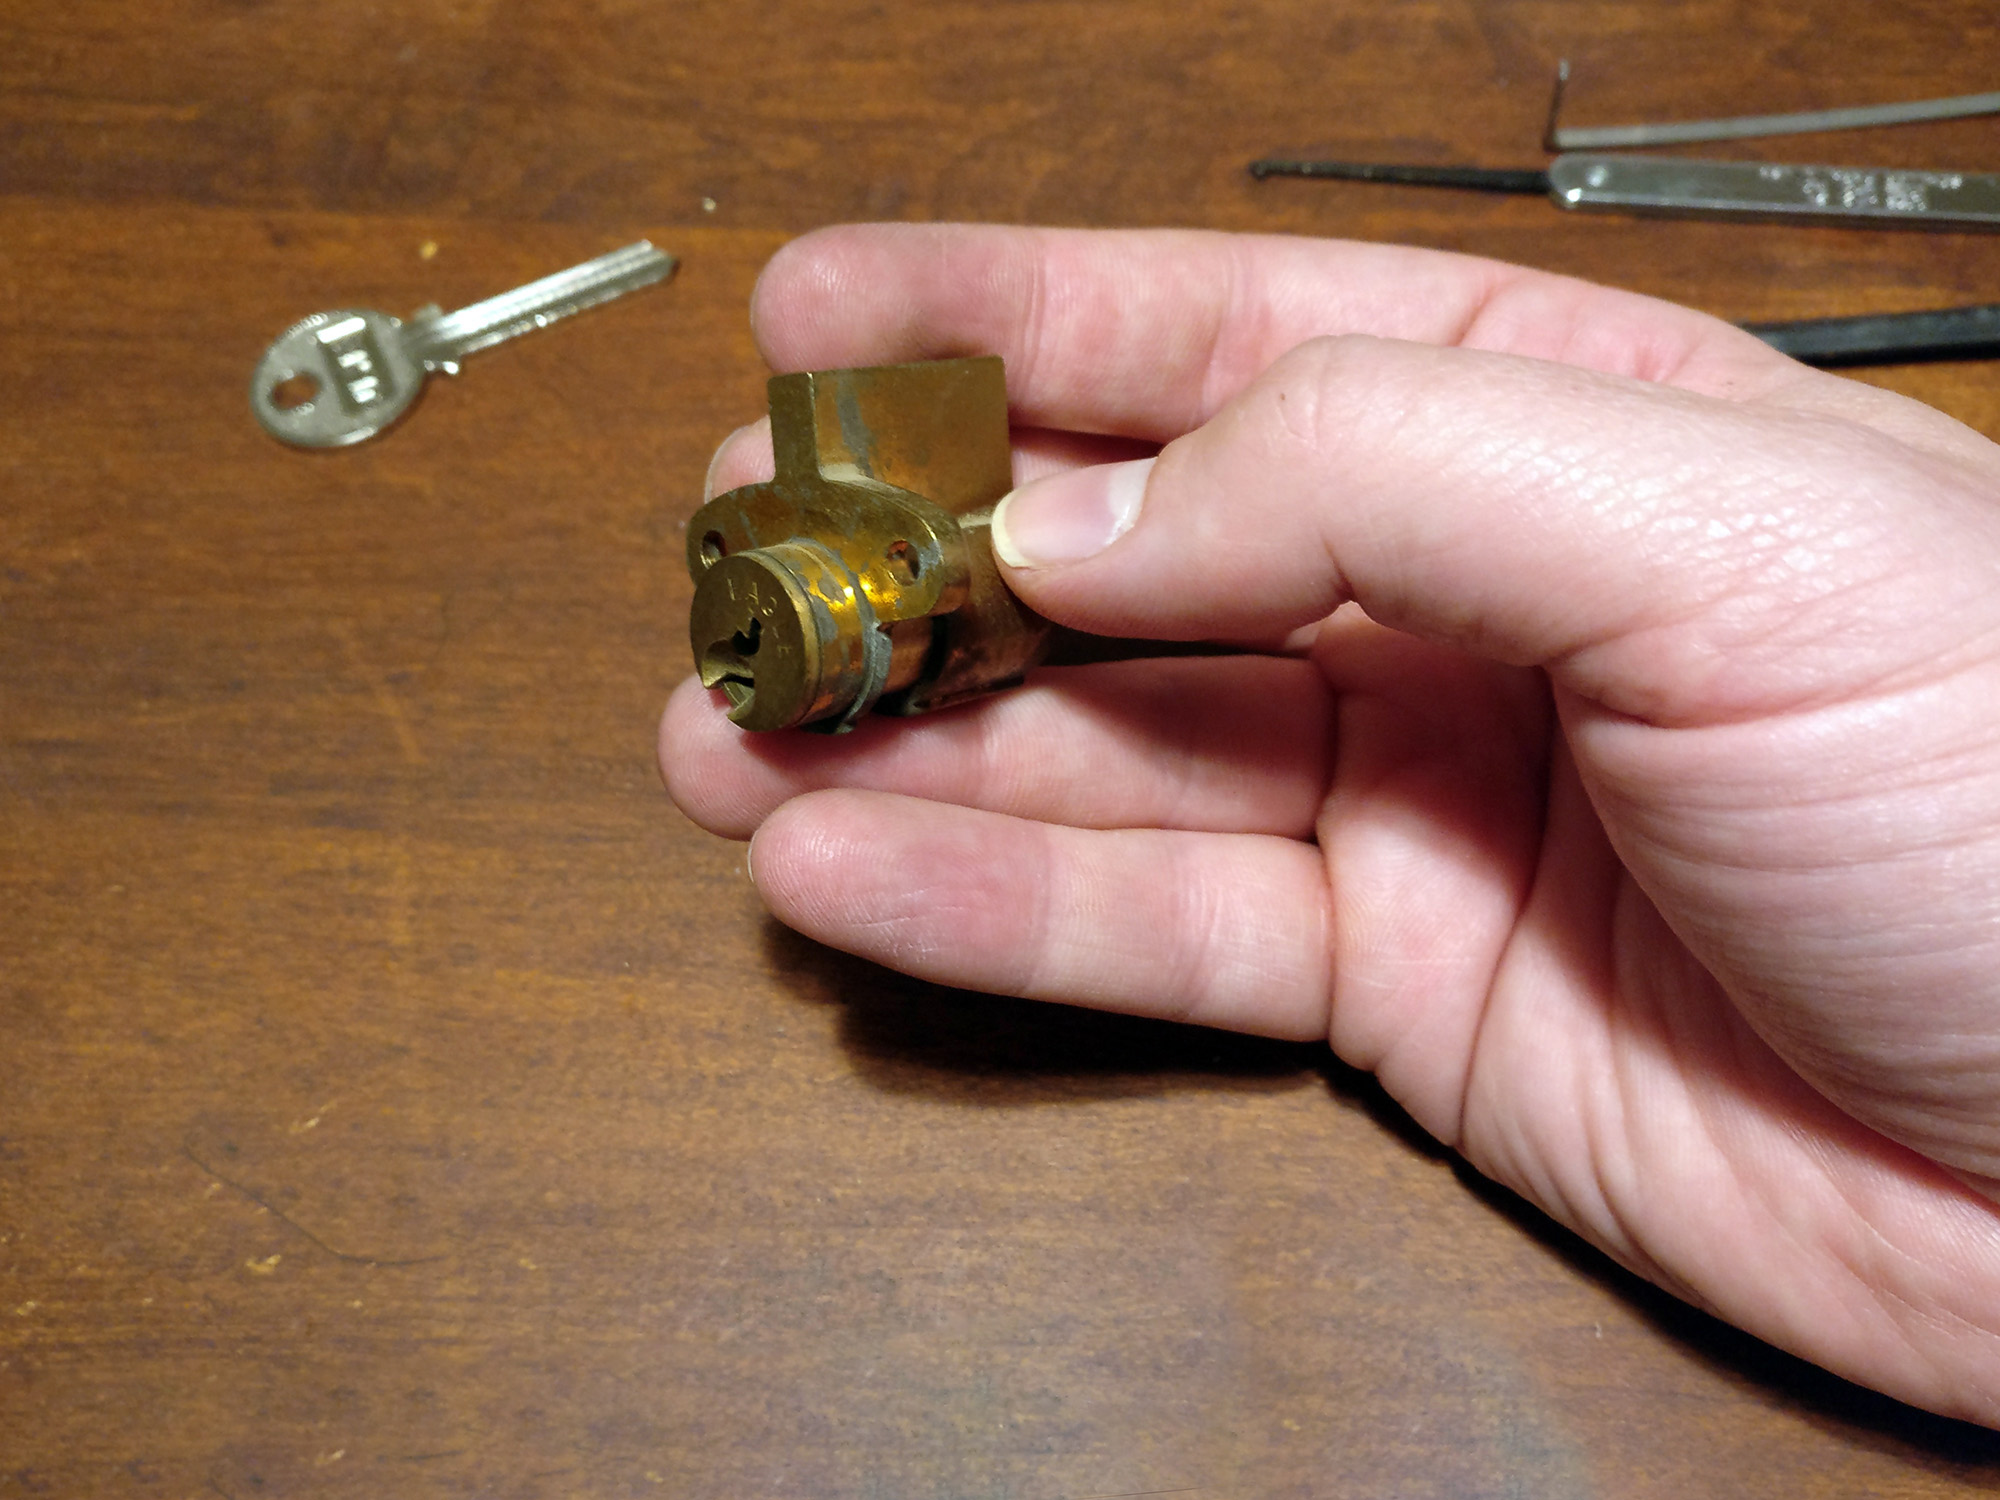
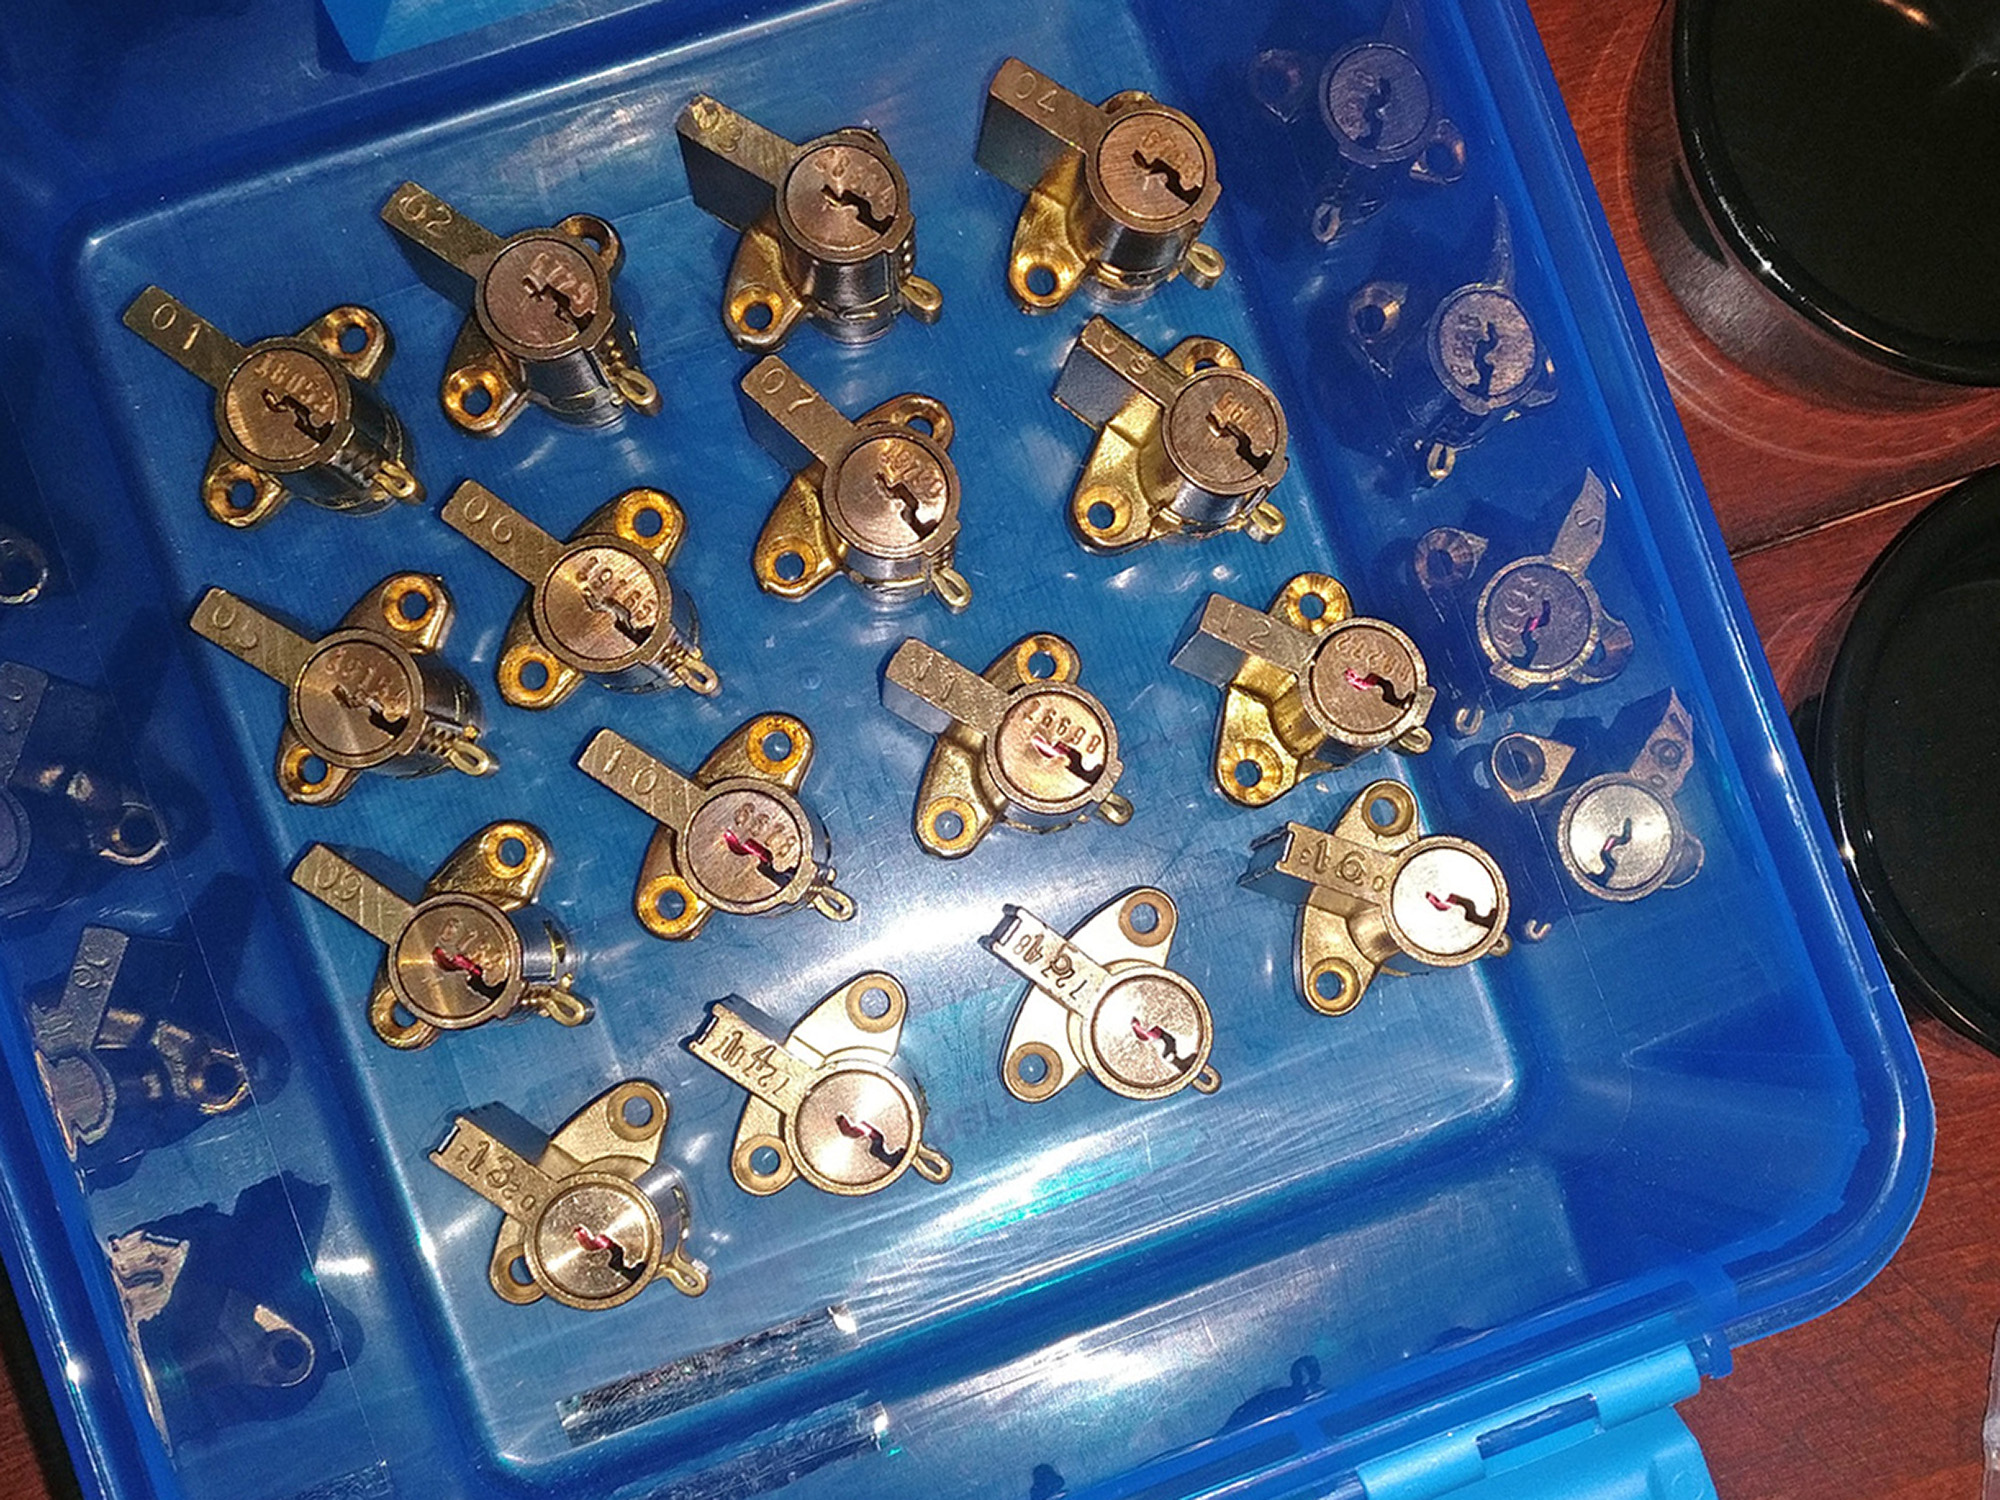
So things were looking up! These locks, old and corroded though they may be, were opening pretty easily for me. One curious note I had pertained to the numerical codes stamped on to the rear of each lock.

At first I wondered if these could be direct bitting codes, but as you can see… that’s not the case. Oh well, no worries… I was not planning to keep the original pins and bitting of all the locks. Everything was going to be rebuilt 100% fresh. And speaking of fresh, these locks needed some extra care and attention before I could consider them useful again…


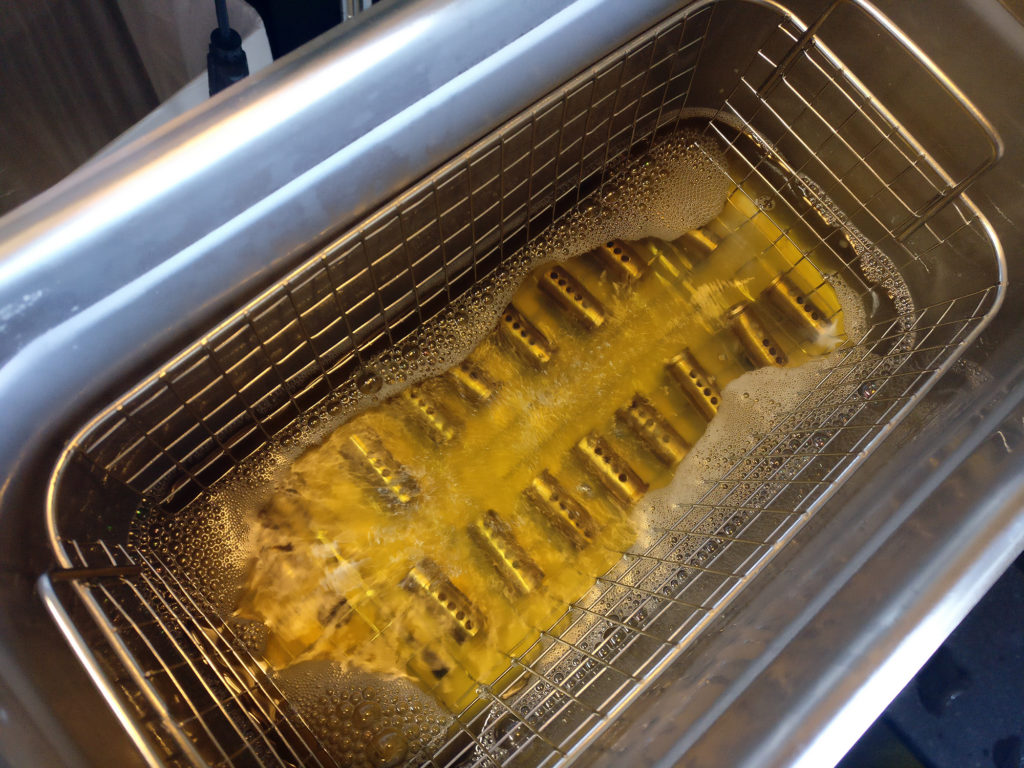
This corrosion and tarnish simply would not do. So it was time to break out the WD-40! Now, as many folk will tell you, WD-40 is not an ideal lubricant to use on locks that are in service. However, if you have old and corroded locks… WD-40 is not a bad product for cleaning and breaking free old, tarnished parts. One of the most interesting ideas I ever heard was someone who advocated putting all their old restoration project parts in a bucket, pouring WD-40 in there, sealing the lid, and then keeping the bucket in their trunk as they drove around for weeks. But I didn’t want to wait weeks. It was time for an ultrasonic bath…
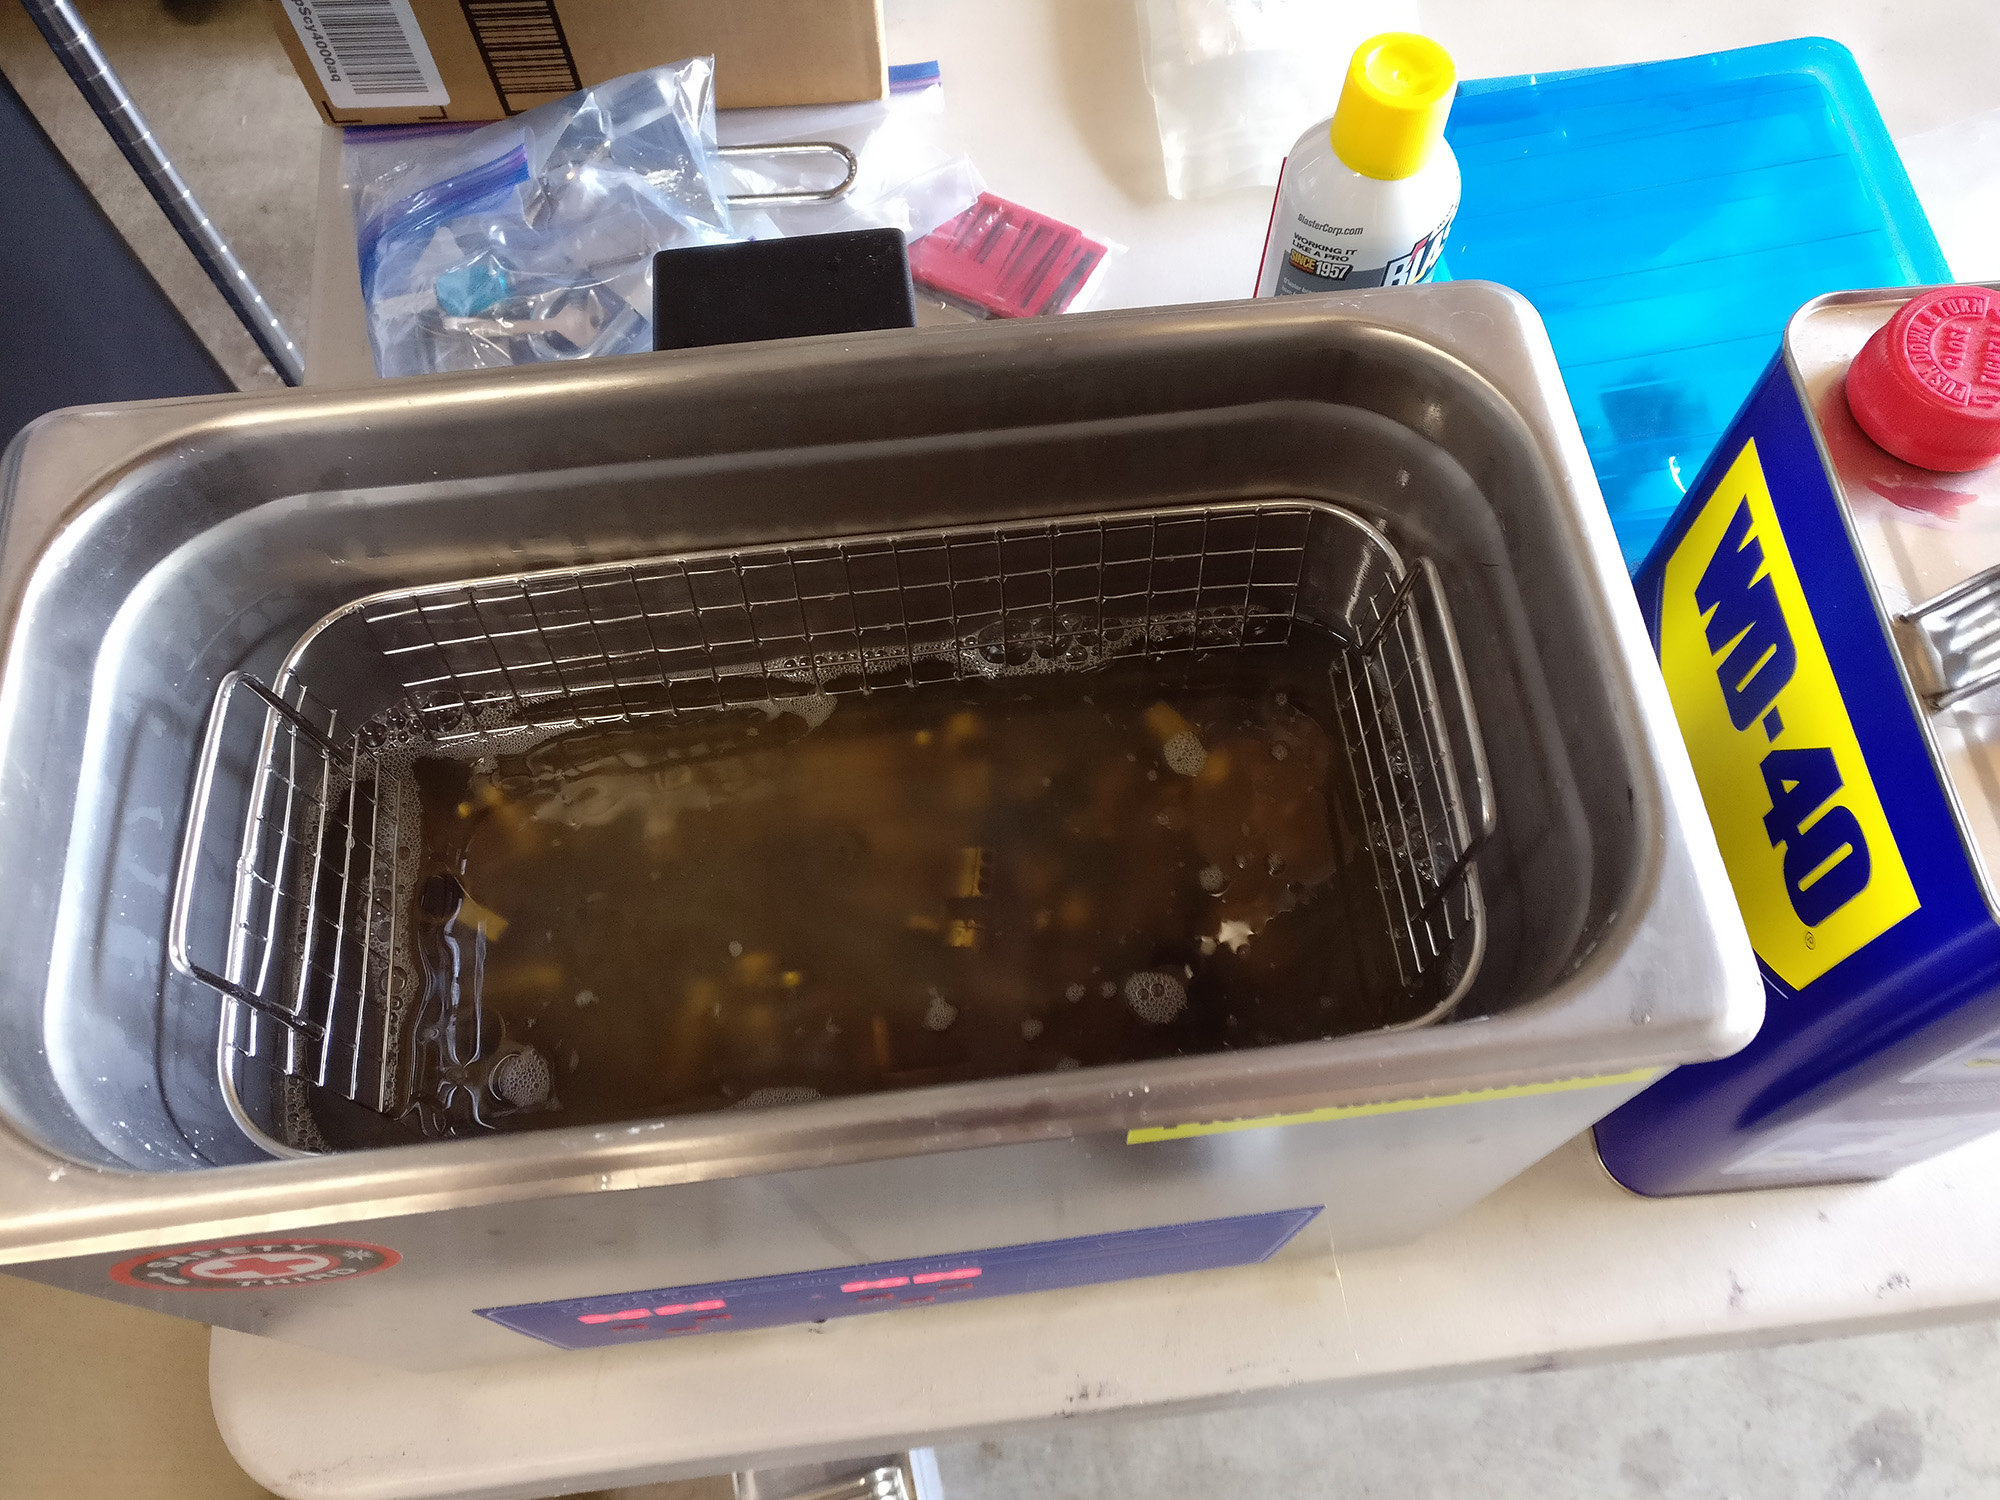
After merely 30 minutes in WD-40 under heavy cavitation, this is how the plugs and housings came out!


Not bad, right? I laid out all the parts and was very happy with how things were shaping up…

… I thought that the very front face of each plug could use a little more shine, however. Being the most exposed part of the locks over the years, they were subject to the most handling, fingerprints, etc. I grabbed a rag and some Brasso and shined up those front faces!

That sure spruced things up. I also, however, left some of the Brasso residue packed into the keyways and I wanted to flush that out of there. I tried blasting some air and wiping the parts off, but honestly, I had the ultrasonic bath right next to me and it was still full of WD-40 so I said why not give things another round…
Everything came out fresh and clean. But, as we have said many times, WD-40 is not an ideal lock lubricant. So after wiping everything dry, I gave a good treatment of graphite to the inside of the lock housings and across the plugs.

Now it was time to try to do something about the very unfortunate heavy coating of mauve paint that had been applied to those metal doors. It was really caked on and had been there for decades. So I wasn’t sure what it would take to get it off there. I started out by trying odorless mineral spirits…

When the OMS didn’t work (even in a heated ultrasonic bath) I asked the staff at Home Depot for suggestions. They sold me a small tub of a thick gel stripper compound, and said to let it sit for a while on the part. I tried that…

And that didn’t make any difference. So I returned the gel and then started to throw everything I could at the painted metal…

I left little portions of the metal doors coated in spots of product and waited a while.
While a few spots resulted in some tiny flakes if I really rubbed and scrubbed hard, nothing seemed like a truly functional solution. These metal doors feature all kind of crenelations and stippling all over their surfaces. I couldn’t dig in with hours of effort on all 16 doors just to hopefully get the paint off. But then, a breakthrough…

One spot on one of the frames started to show some good signs of flaking after I let things sit a bit longer. I checked my notes, and it turns out this was a spot treated with Jasco Paint Stripper and Epoxy Remover. So, the most caustic and formidable product I had was likely a big enough gun to fire at this problem!
If you have a project like this at home, I cannot stress enough just how dangerous this substance is. It’s not going to eat away at your flesh like xenomorph blood… but it will not escape your notice if you get any on yourself. Rinse it off quickly, lest you start to feel a burning sensation that won’t abate until you flush the area with water.
Wanting to maximize the effect of things, I prepared another hot bath and had some success with one test piece…

… then I started running the parts through it in 3 to 5 minute rounds each…

… basically I was taking doors off the front of the box and dropping them into the Jasco bath, and with each new door going in on one side of the tub, I’d pull one out of the queue from the other end. It was like an assembly line.

I was of course disassembling all the other components from the doors as I removed them…

As I pulled the doors out of the Jasco solution and let them sit, the impact of the heated agitation was immediately obvious…


With the paint finally worked loose, I was able to use a wire brush to scrub it all away. The deep grooves, the stippling, all of it came clean and revealed the wonderful original brass beneath.


I was thrilled to have finally stripped the metal clean of all that old paint. But, of course, I didn’t want to leave the doors in this condition. I wasn’t going to let caustic chemicals remain in the grooves and hinge crevices, etc. So I put them back into another WD-40 bath to soak out all the remaining Jasco while I turned my attention to the next phase of the project.

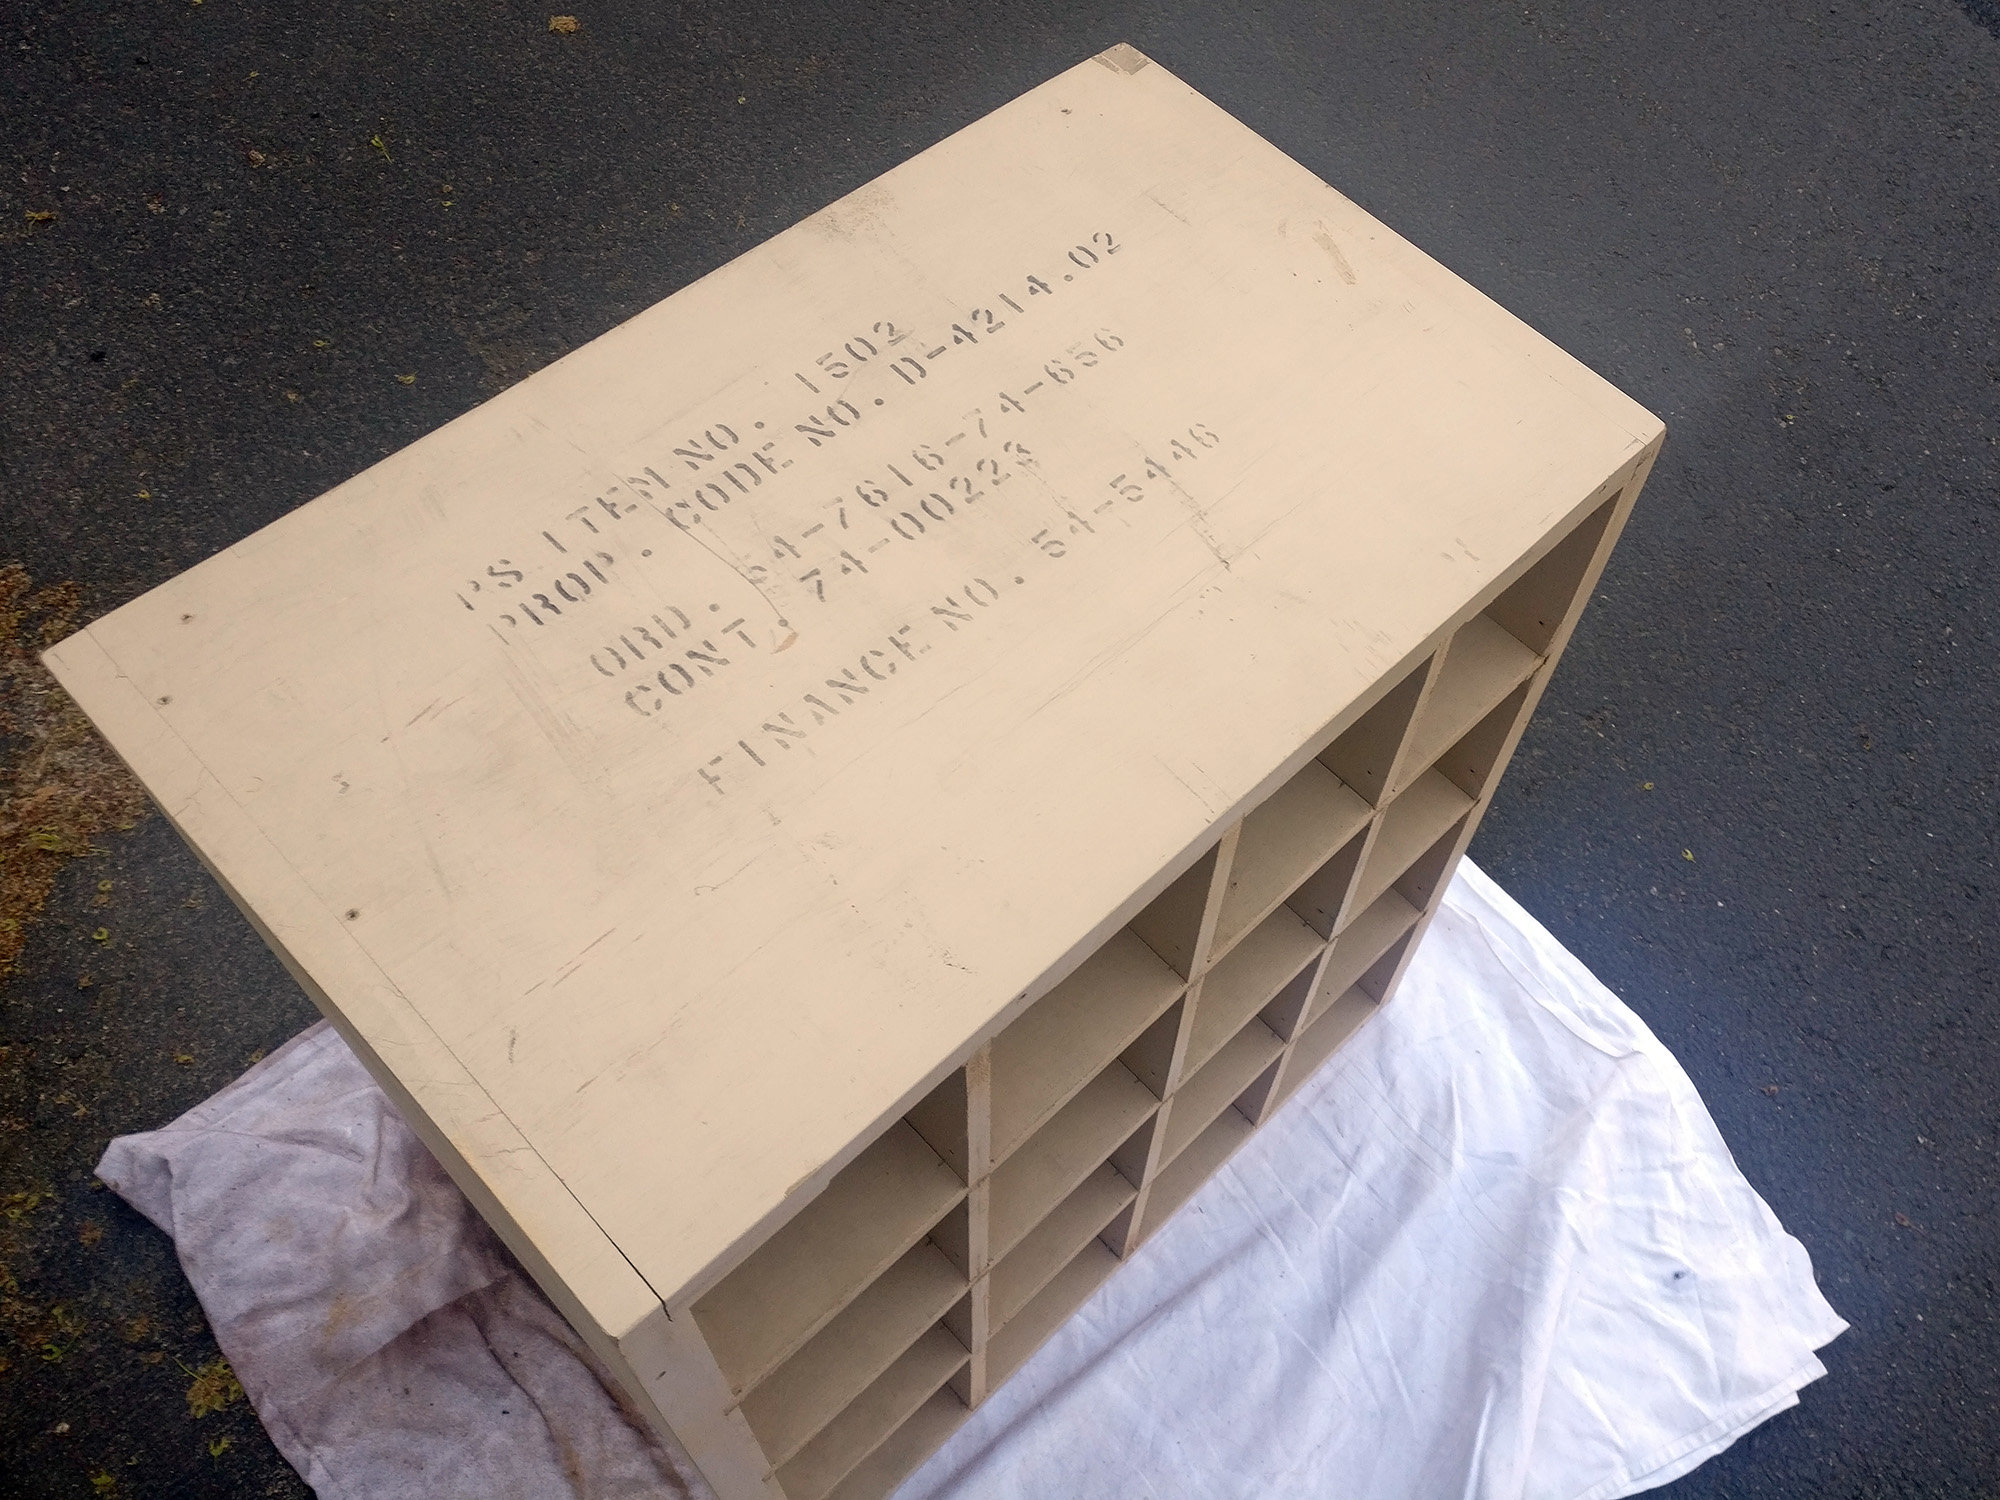
It wasn’t just the gorgeous old brass doors that had been painted over. The wood cabinet itself was a dull khaki color and had some government codes stamped on it.
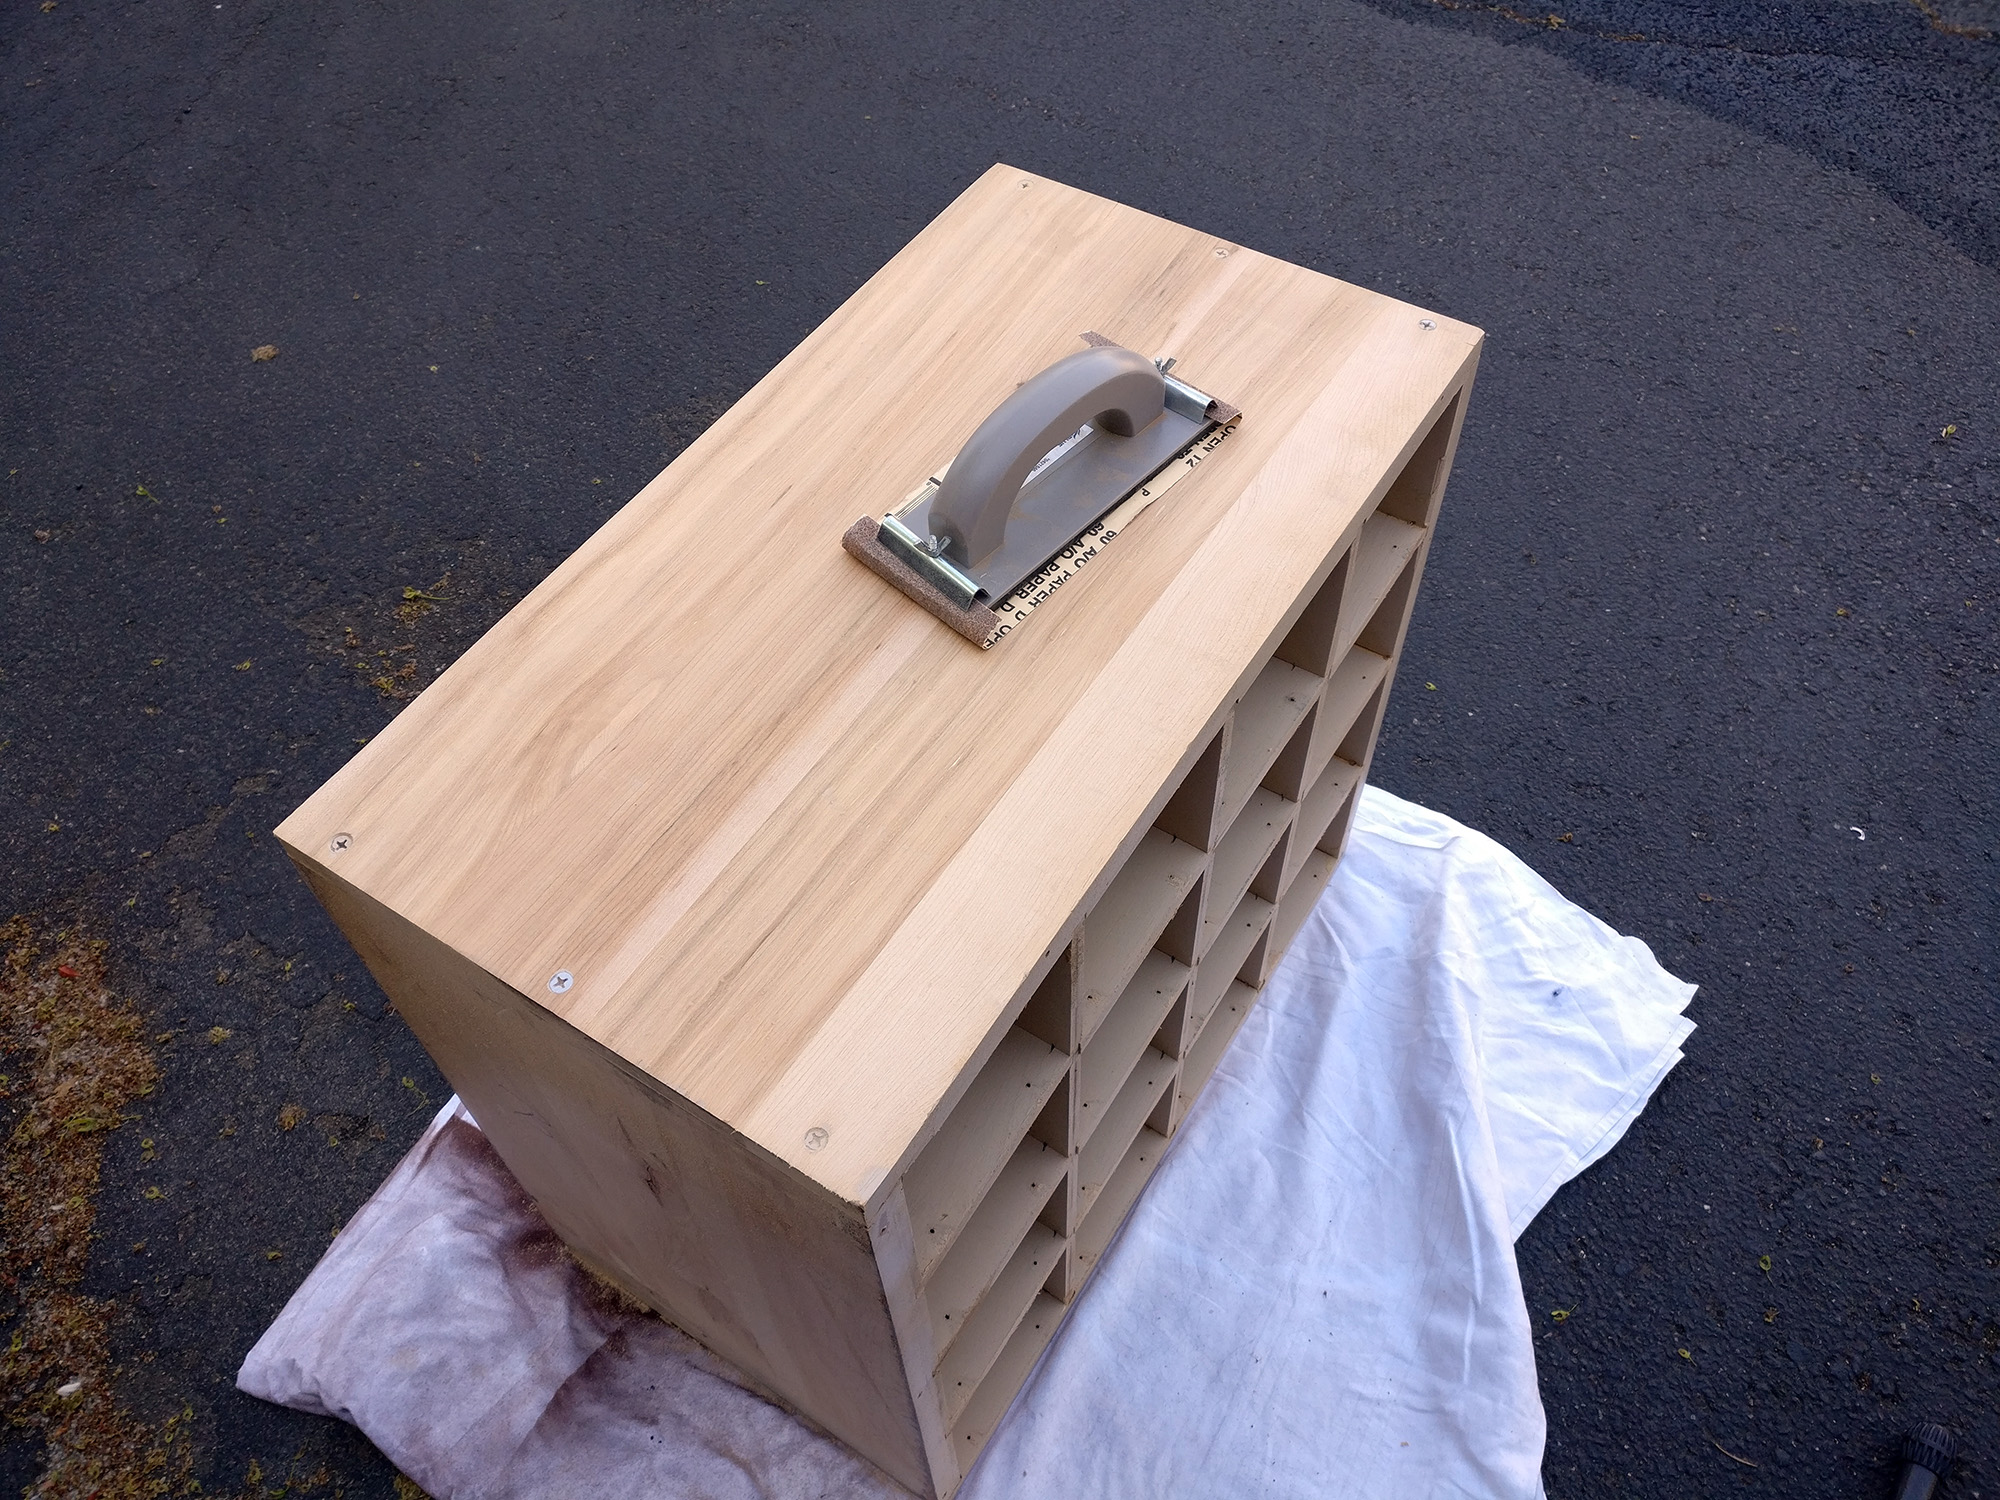
As neat at that is, I was planning to use this as a display piece in our home and at an upcoming event. So I knew this would have to be sanded down. I love restoring old furniture, so this was well within my wheelhouse.
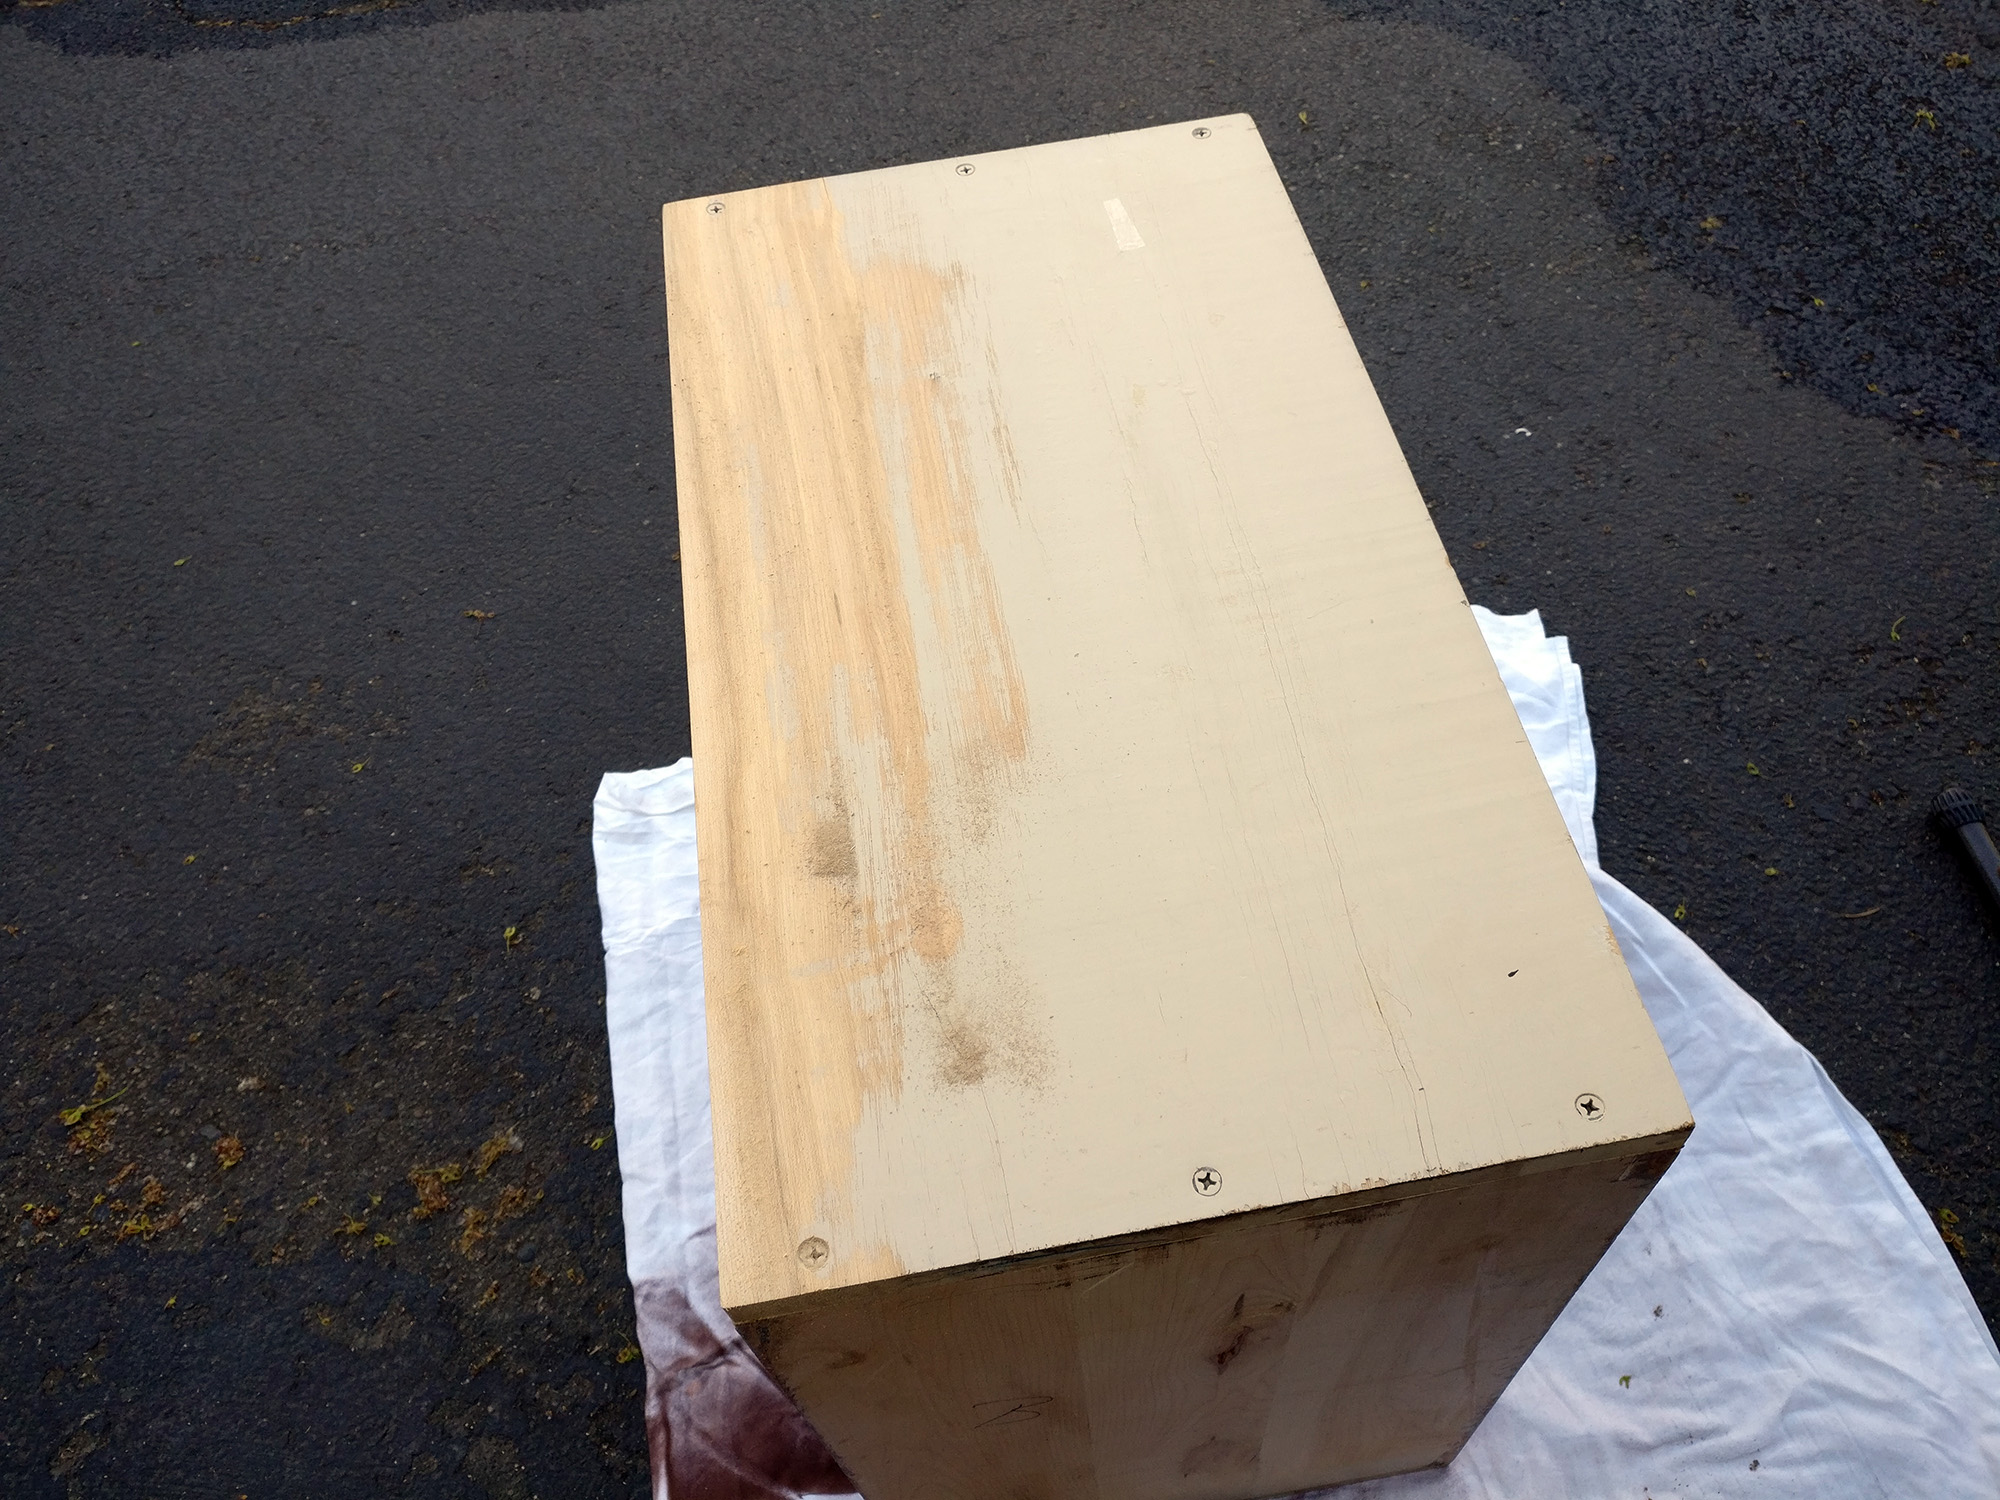
The belt sander and my sanding pad made short work of things. Given all the small, curved surfaces I’ve restored in the past… it was beyond wonderful to simply have nice, flat boards to work with!
The only spots where paint was a little recalcitrant were the dado joints, since surfaces didn’t match up perfectly smoothly. But a little extra effort got them into line.

Finally the entire wood was bare on all sides and even on the small slats in the middle.

I had started with 60 grit and then 100 grit paper, then I did a pass with 220 to prep the surface for staining. I took a short break from this effort by getting all the brass doors out of the ultrasonic bath to pat them off and let them drain, then I applied the first coat of stain and brought the box inside to dry for the night.

That evening, I set about the task of re-pinning all of the lock cylinders. I had cleaned, polished, and lubricated them all so it was really a treat to see how smoothly they started to function as I pinned them up. I had all of my proper, working keys for the task on hand (the JMA blanks were a perfect fit, and the keys were originated on a Blitz 1200, if you’re curious) and a detailed pining sheet allowed me to progress through the task easily, as I listened to podcasts.
Because I didn’t want to mix up the locks once I had meticulously prepared them, I added my own numerical stamp codes to the rear sides of their housings.

Happy with the day’s work, I went to bed. The next morning I awoke eager to keep at it, and that afternoon I was back downstairs and hauling the big box outside again for more stain.

With a second coat of stain applied, I had time to then begin re-assembling the individual brass doors. I cleaned all the panes of glass (I was amazed that they had all survived and were intact when I purchased this piece) and I took care to not crack any of them now.


I reassembled the spring latch rods and fitted locks into their mounts. The doors all worked like a charm. 🙂


Sixteen doors… all reassembled… all locks re-pinned… all lubricated… all brass clean and polished… it felt amazing, I won’t lie.

I went back outside and the second coat of stain had sufficiently dried enough to begin applying varathane satin clearcoat. Things really started to look wonderful at that point.
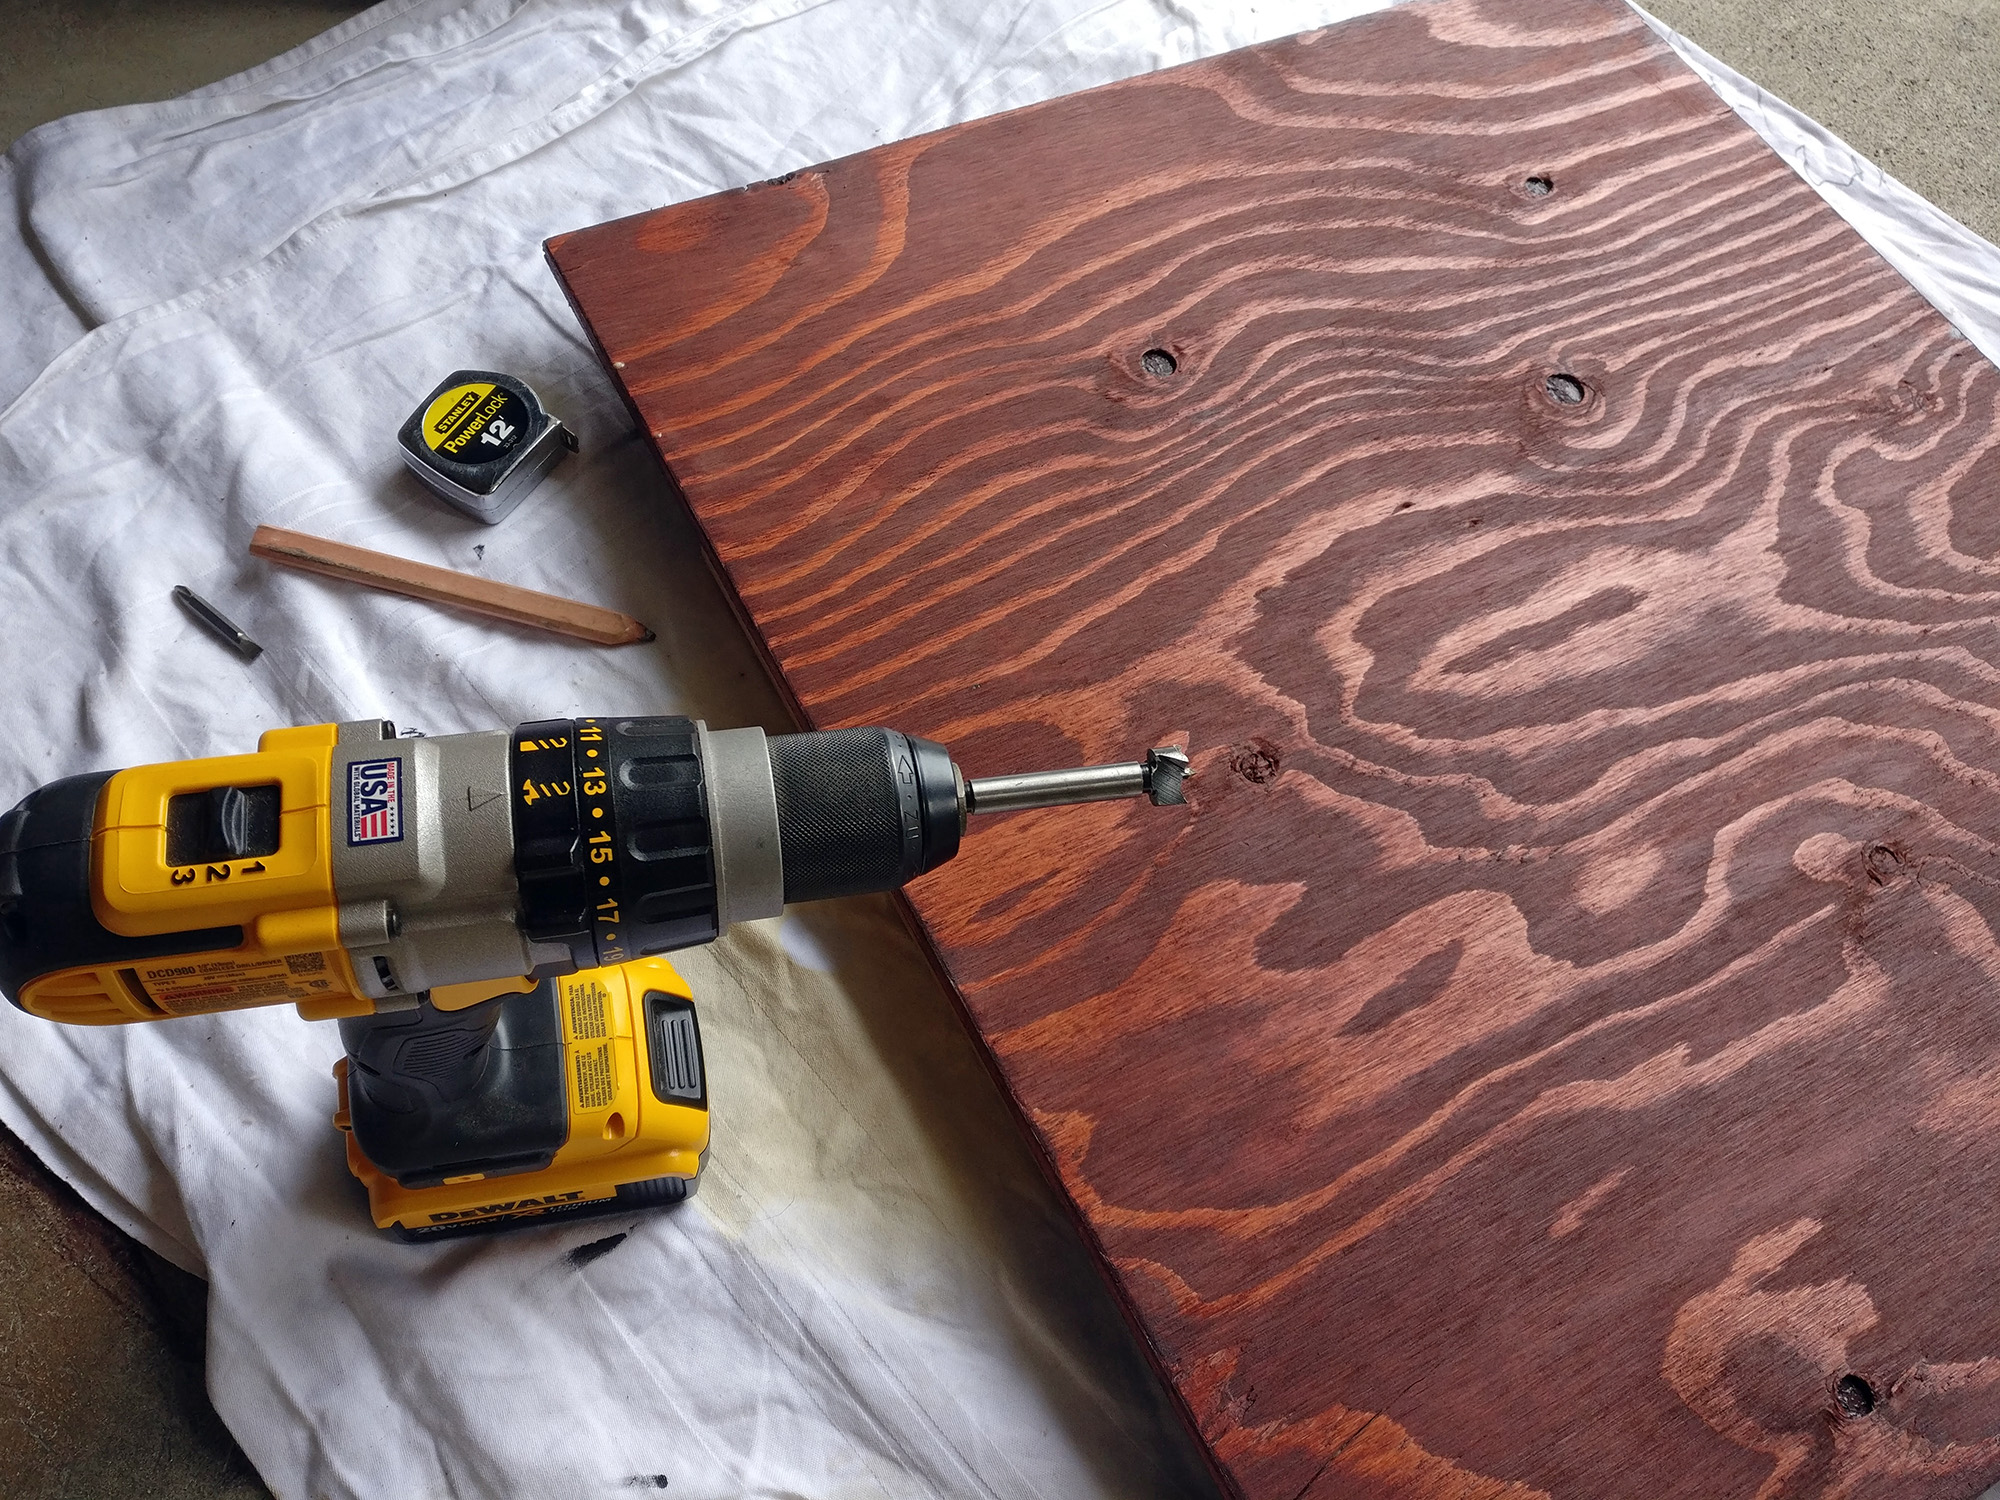
I also took a look in my assorted oak board pile and found a piece suitable to become the back cover. Some measurements and a quick run with the Skill saw had a decent board ready for stain and coating. After letting things sit in the driveway for a time while I did other work, I hauled them all back inside and applied another coat of polyurethane.

Much later that night, just before going to bed around 2:30, I went all the way back downstairs to apply one more coat across everything and let it dry all through the night. The next morning was going to be the start of assembly day. 🙂
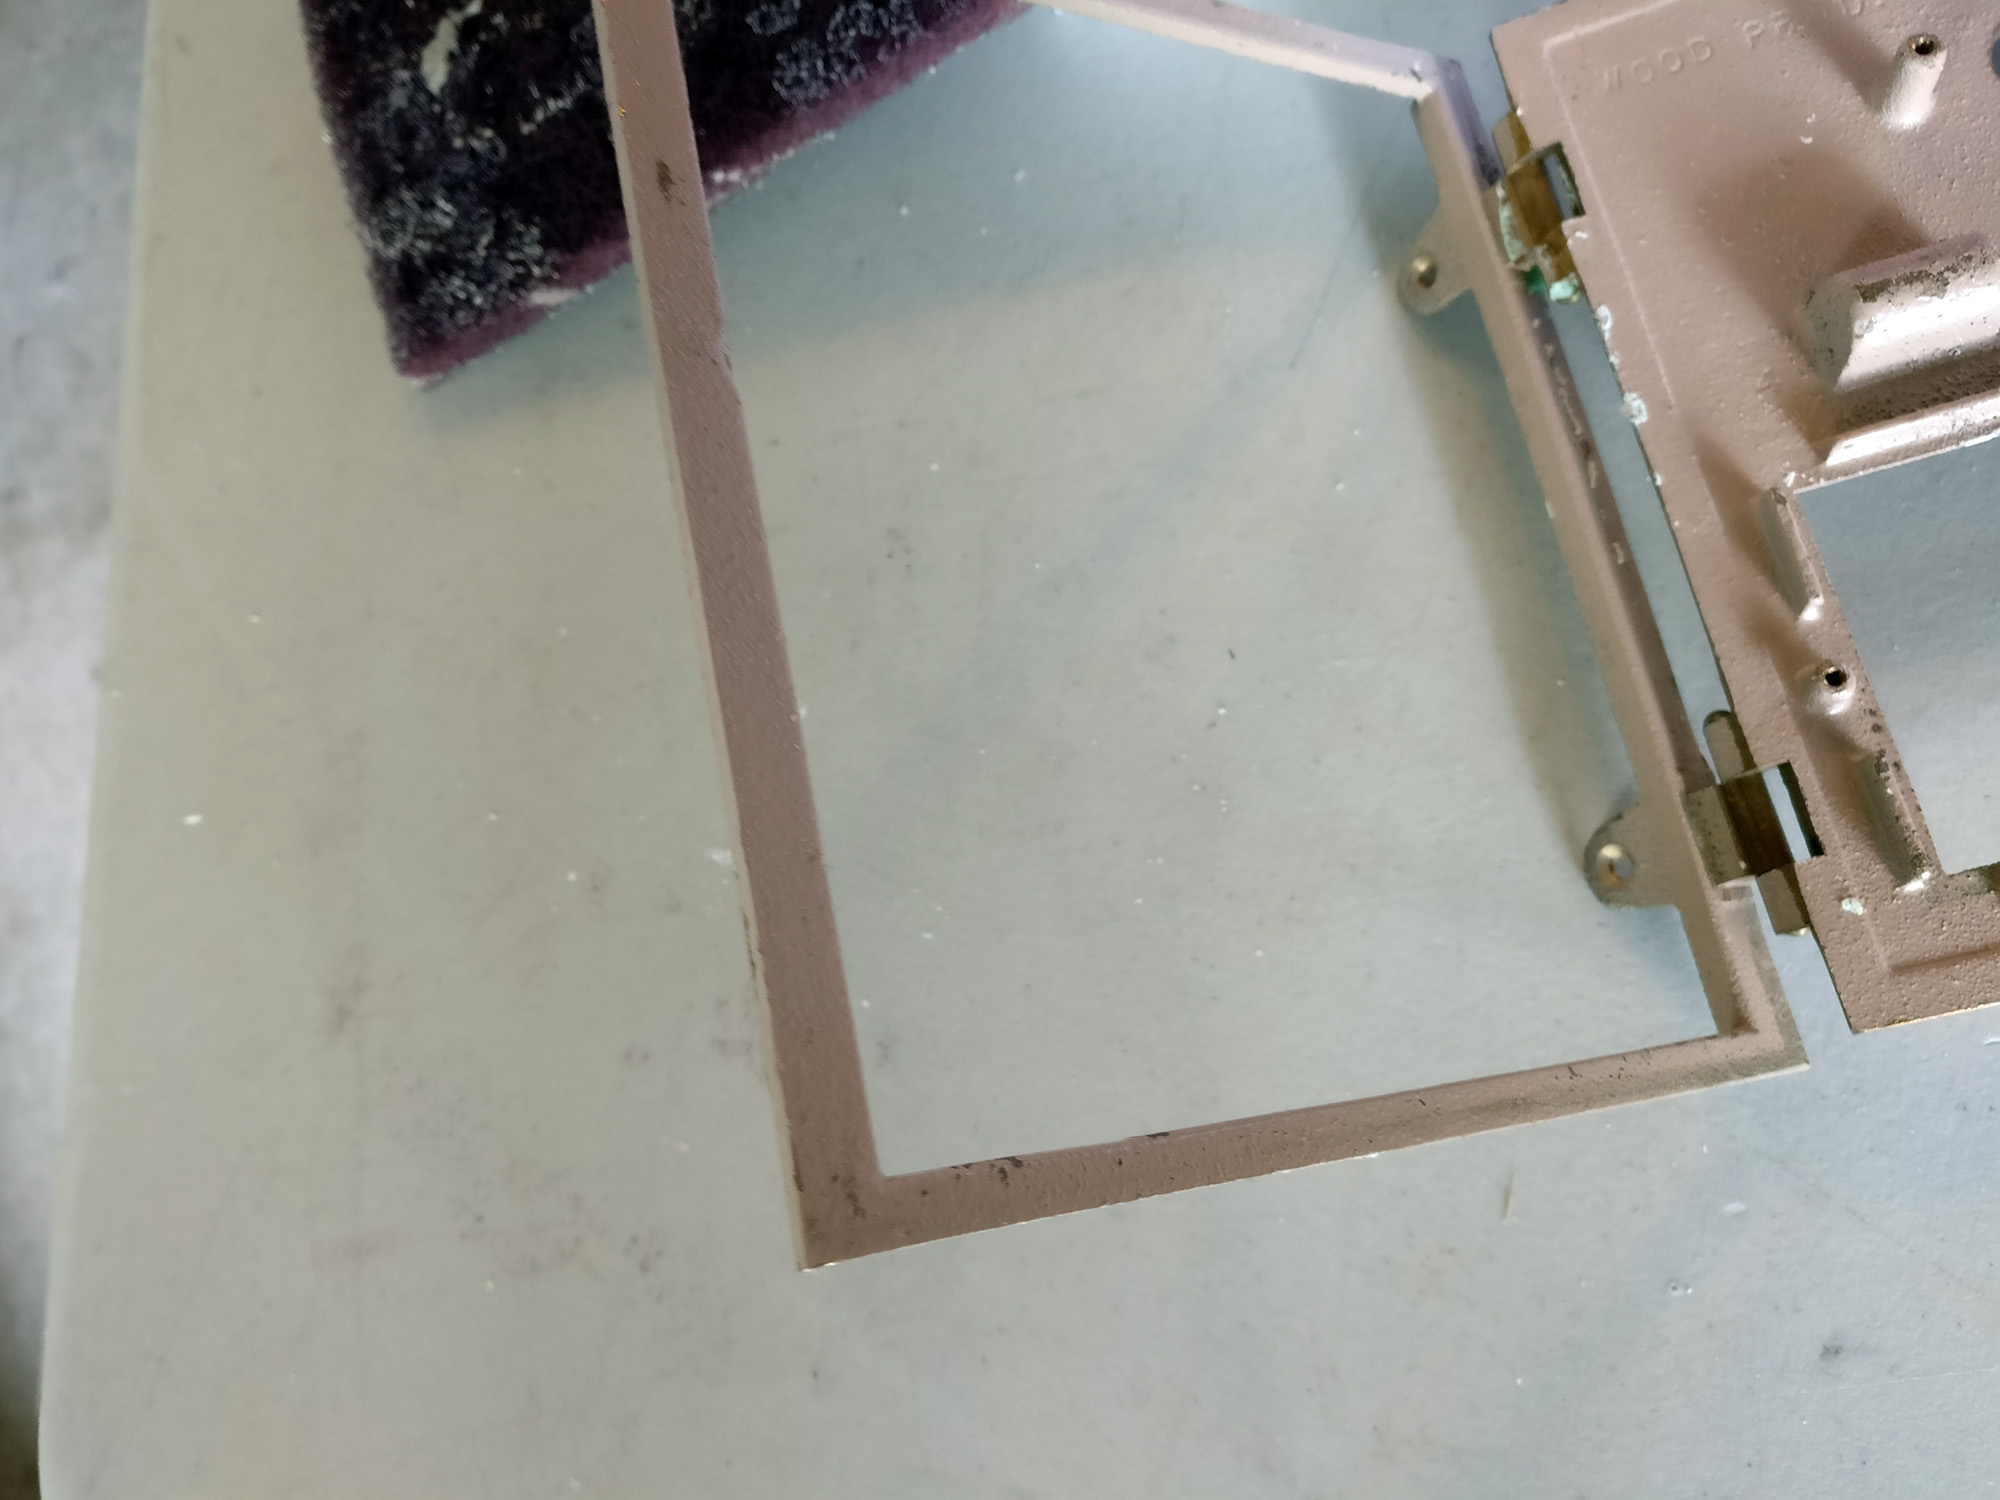
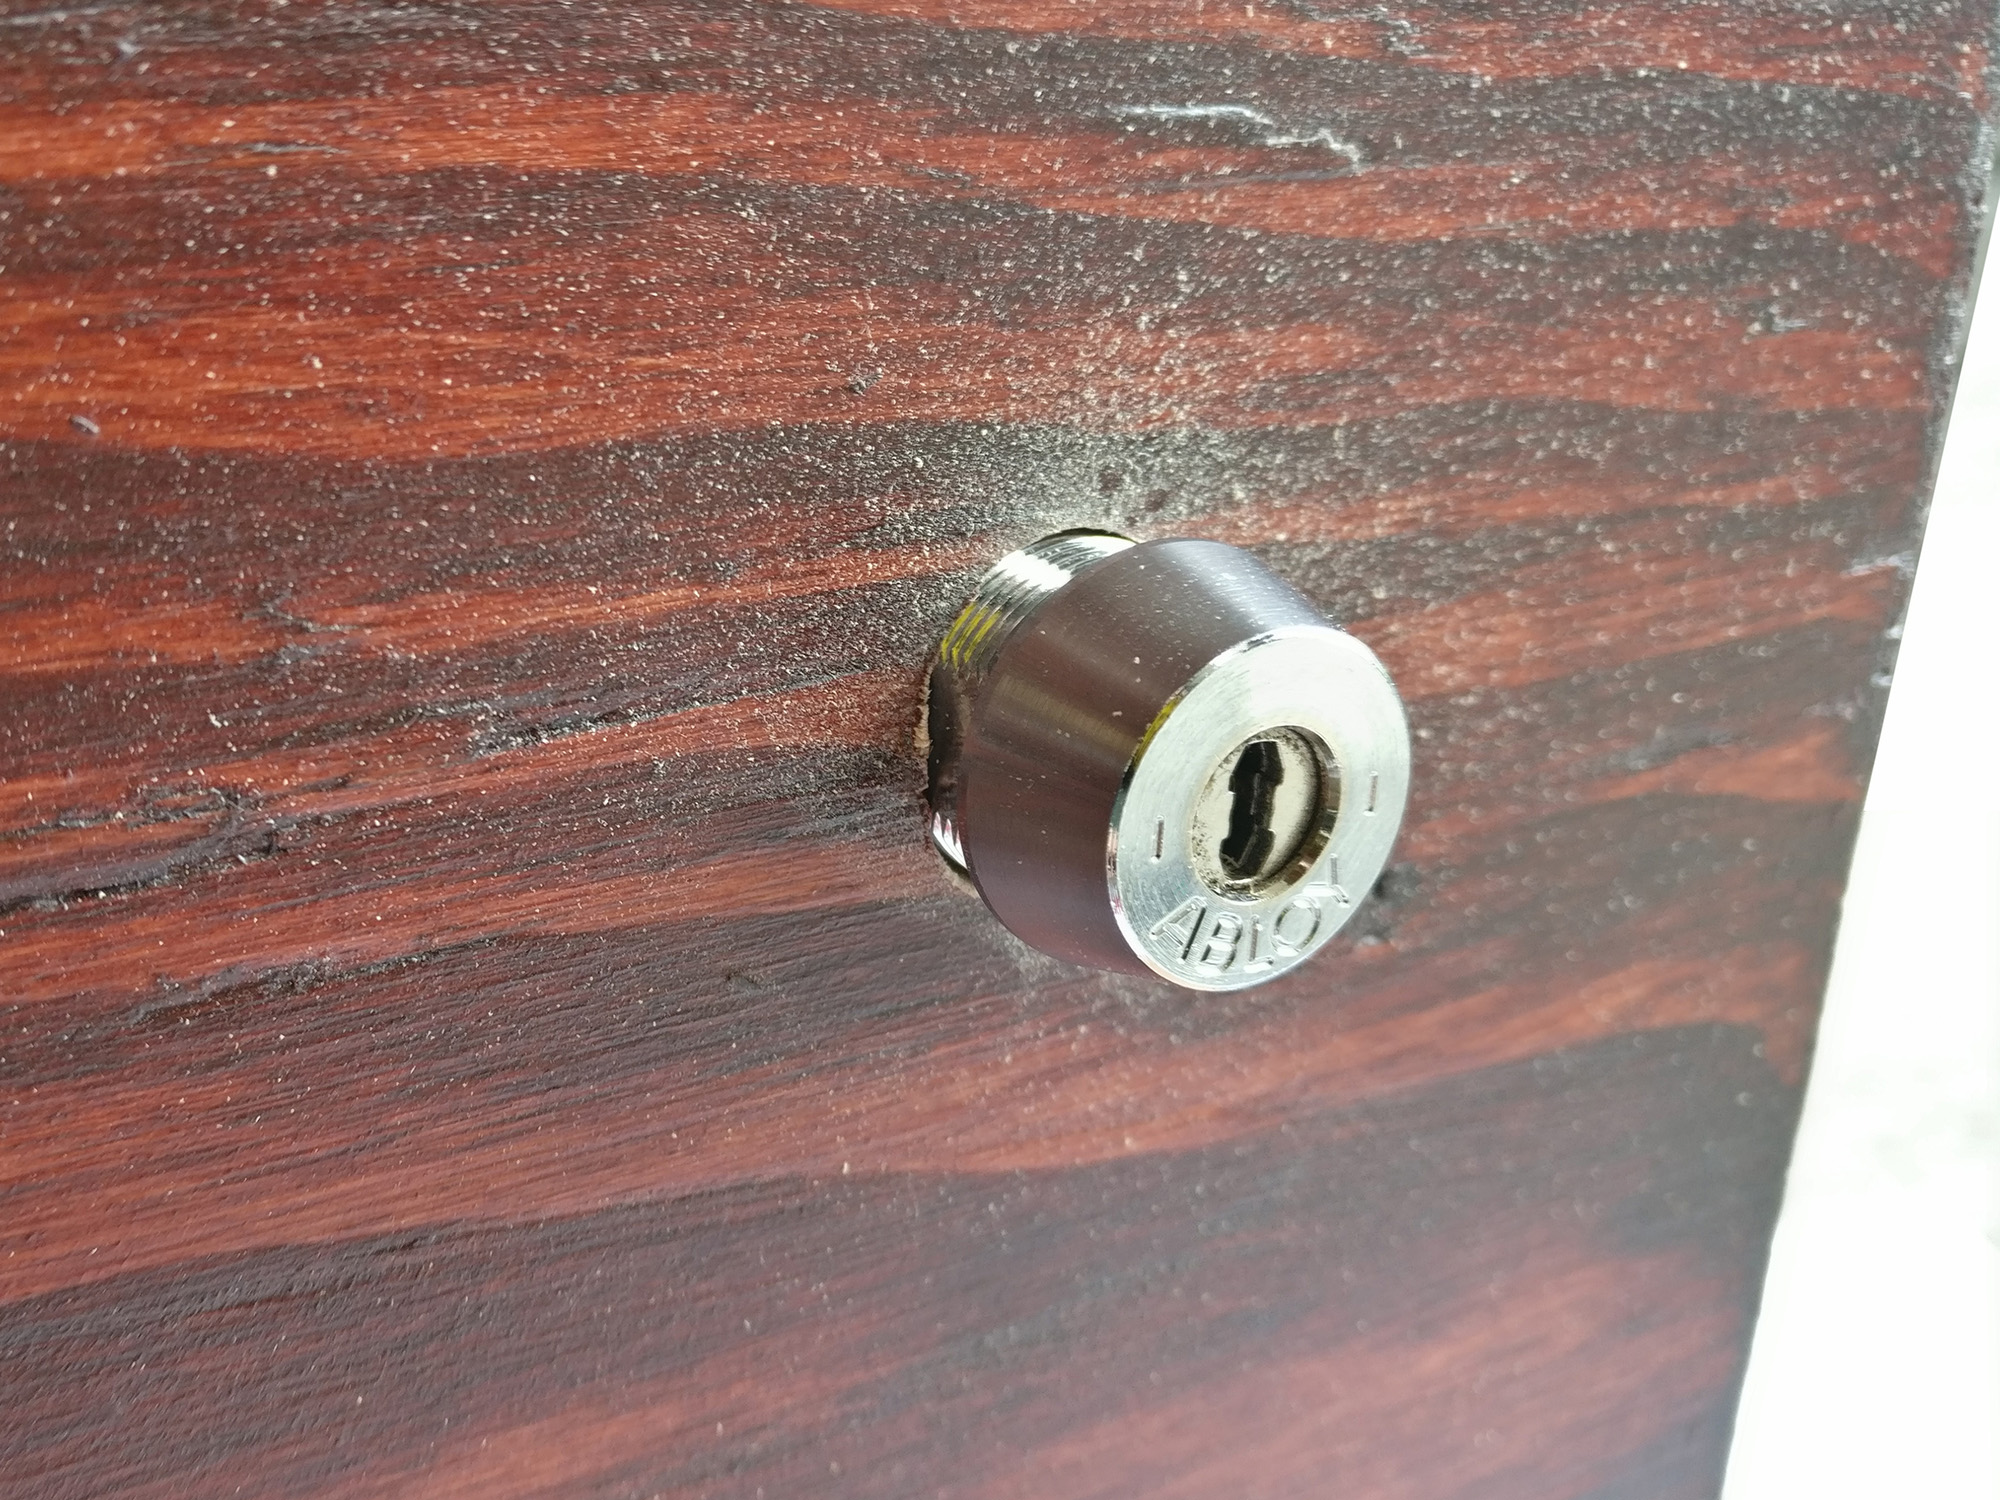
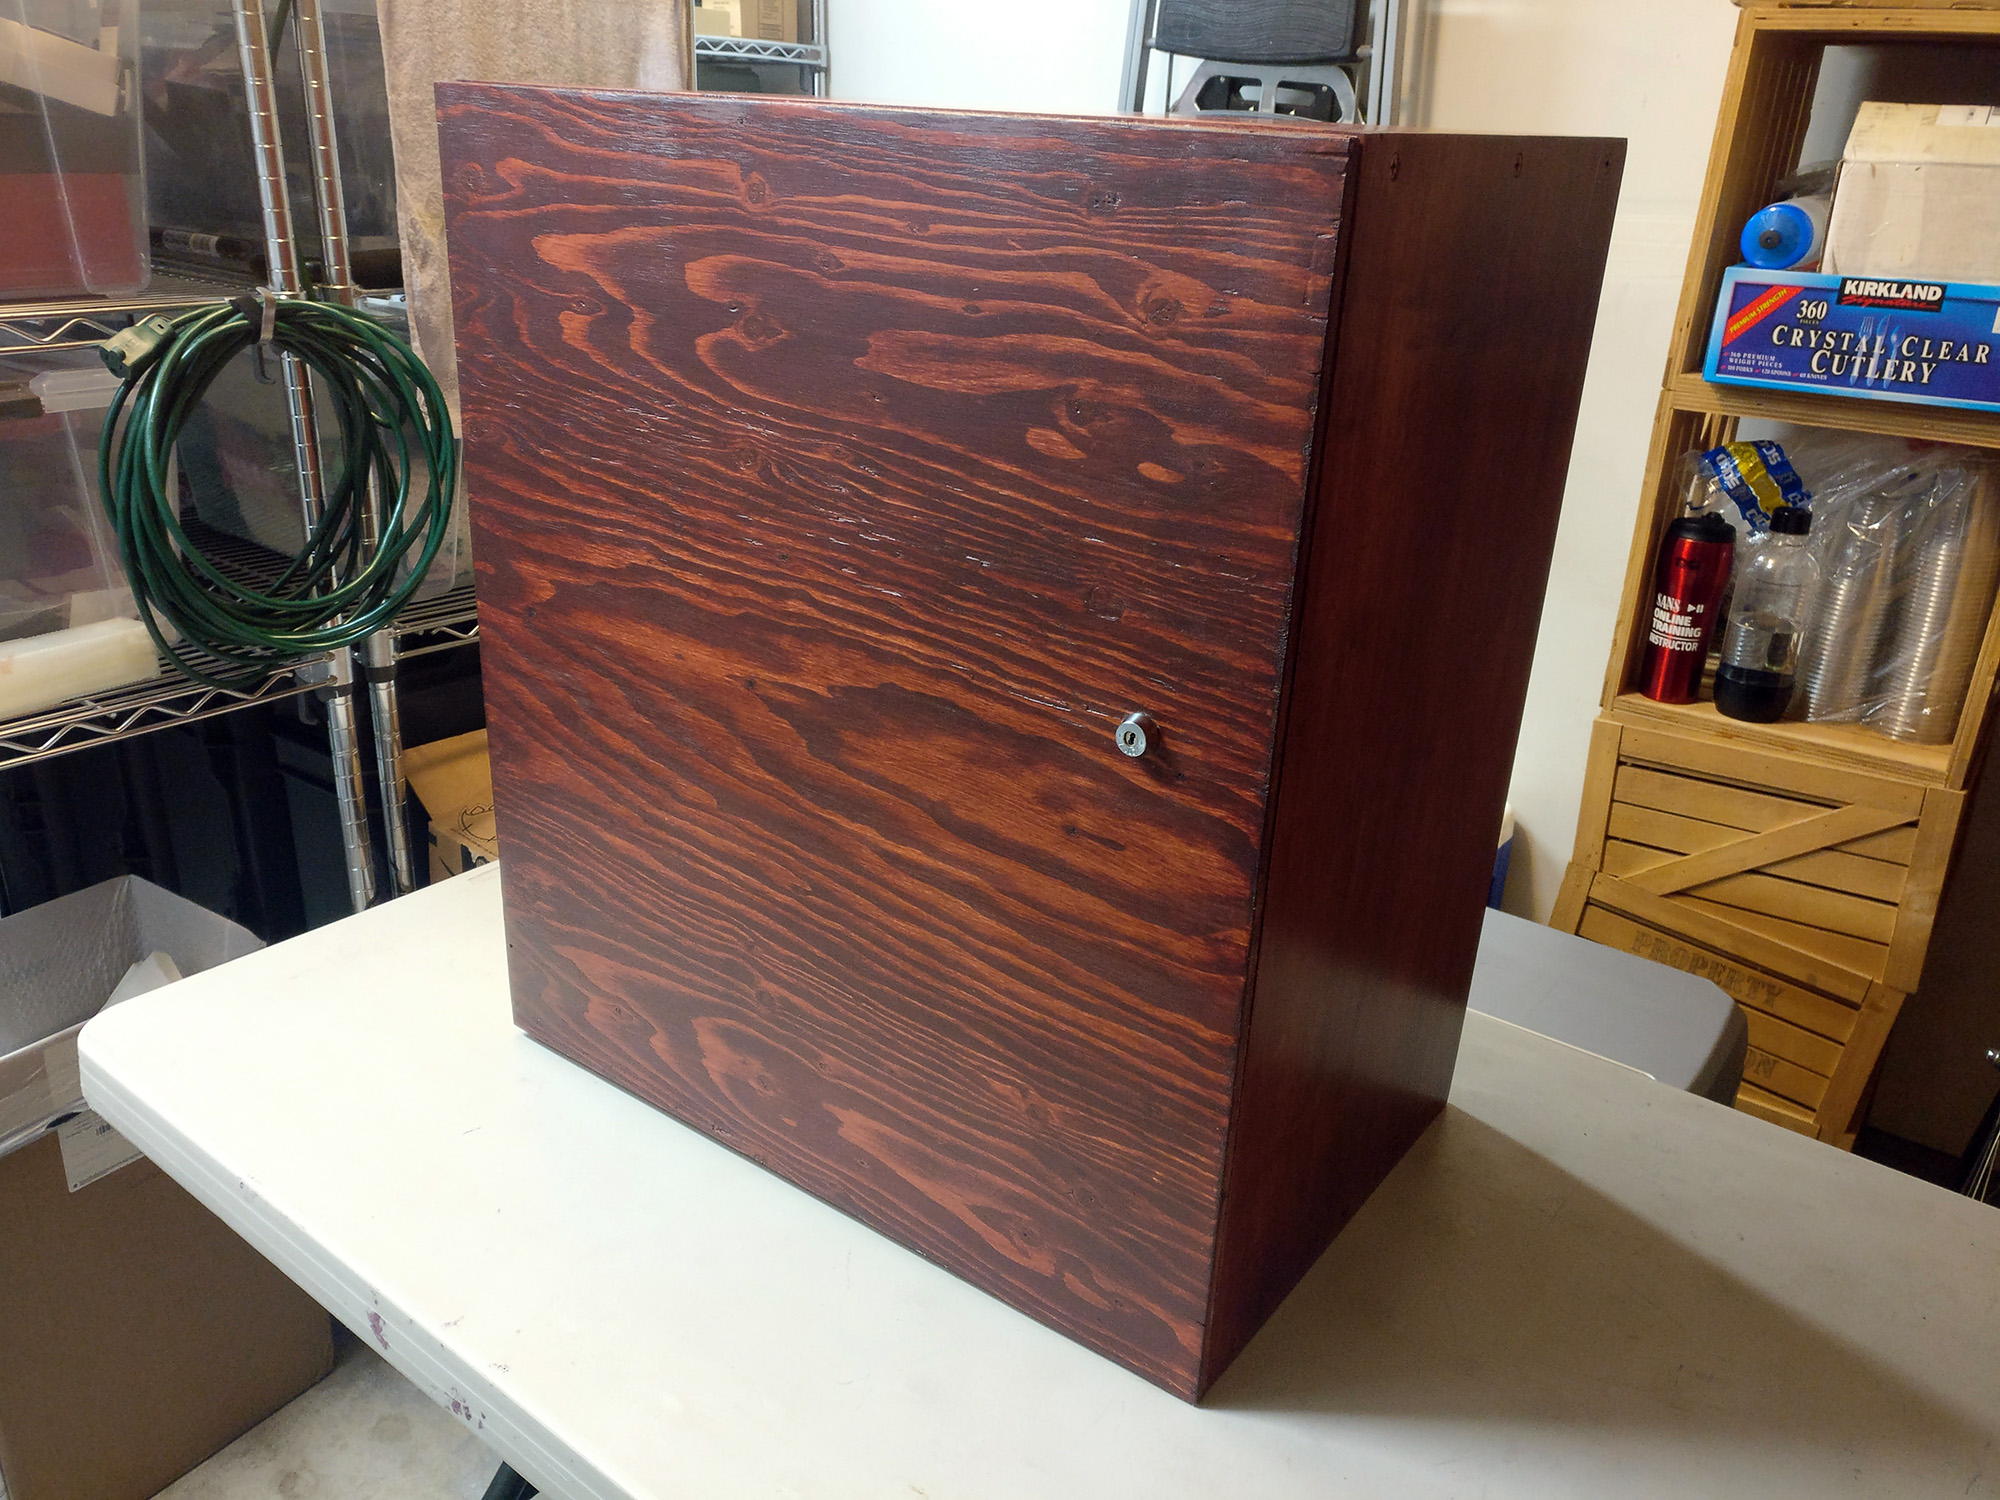
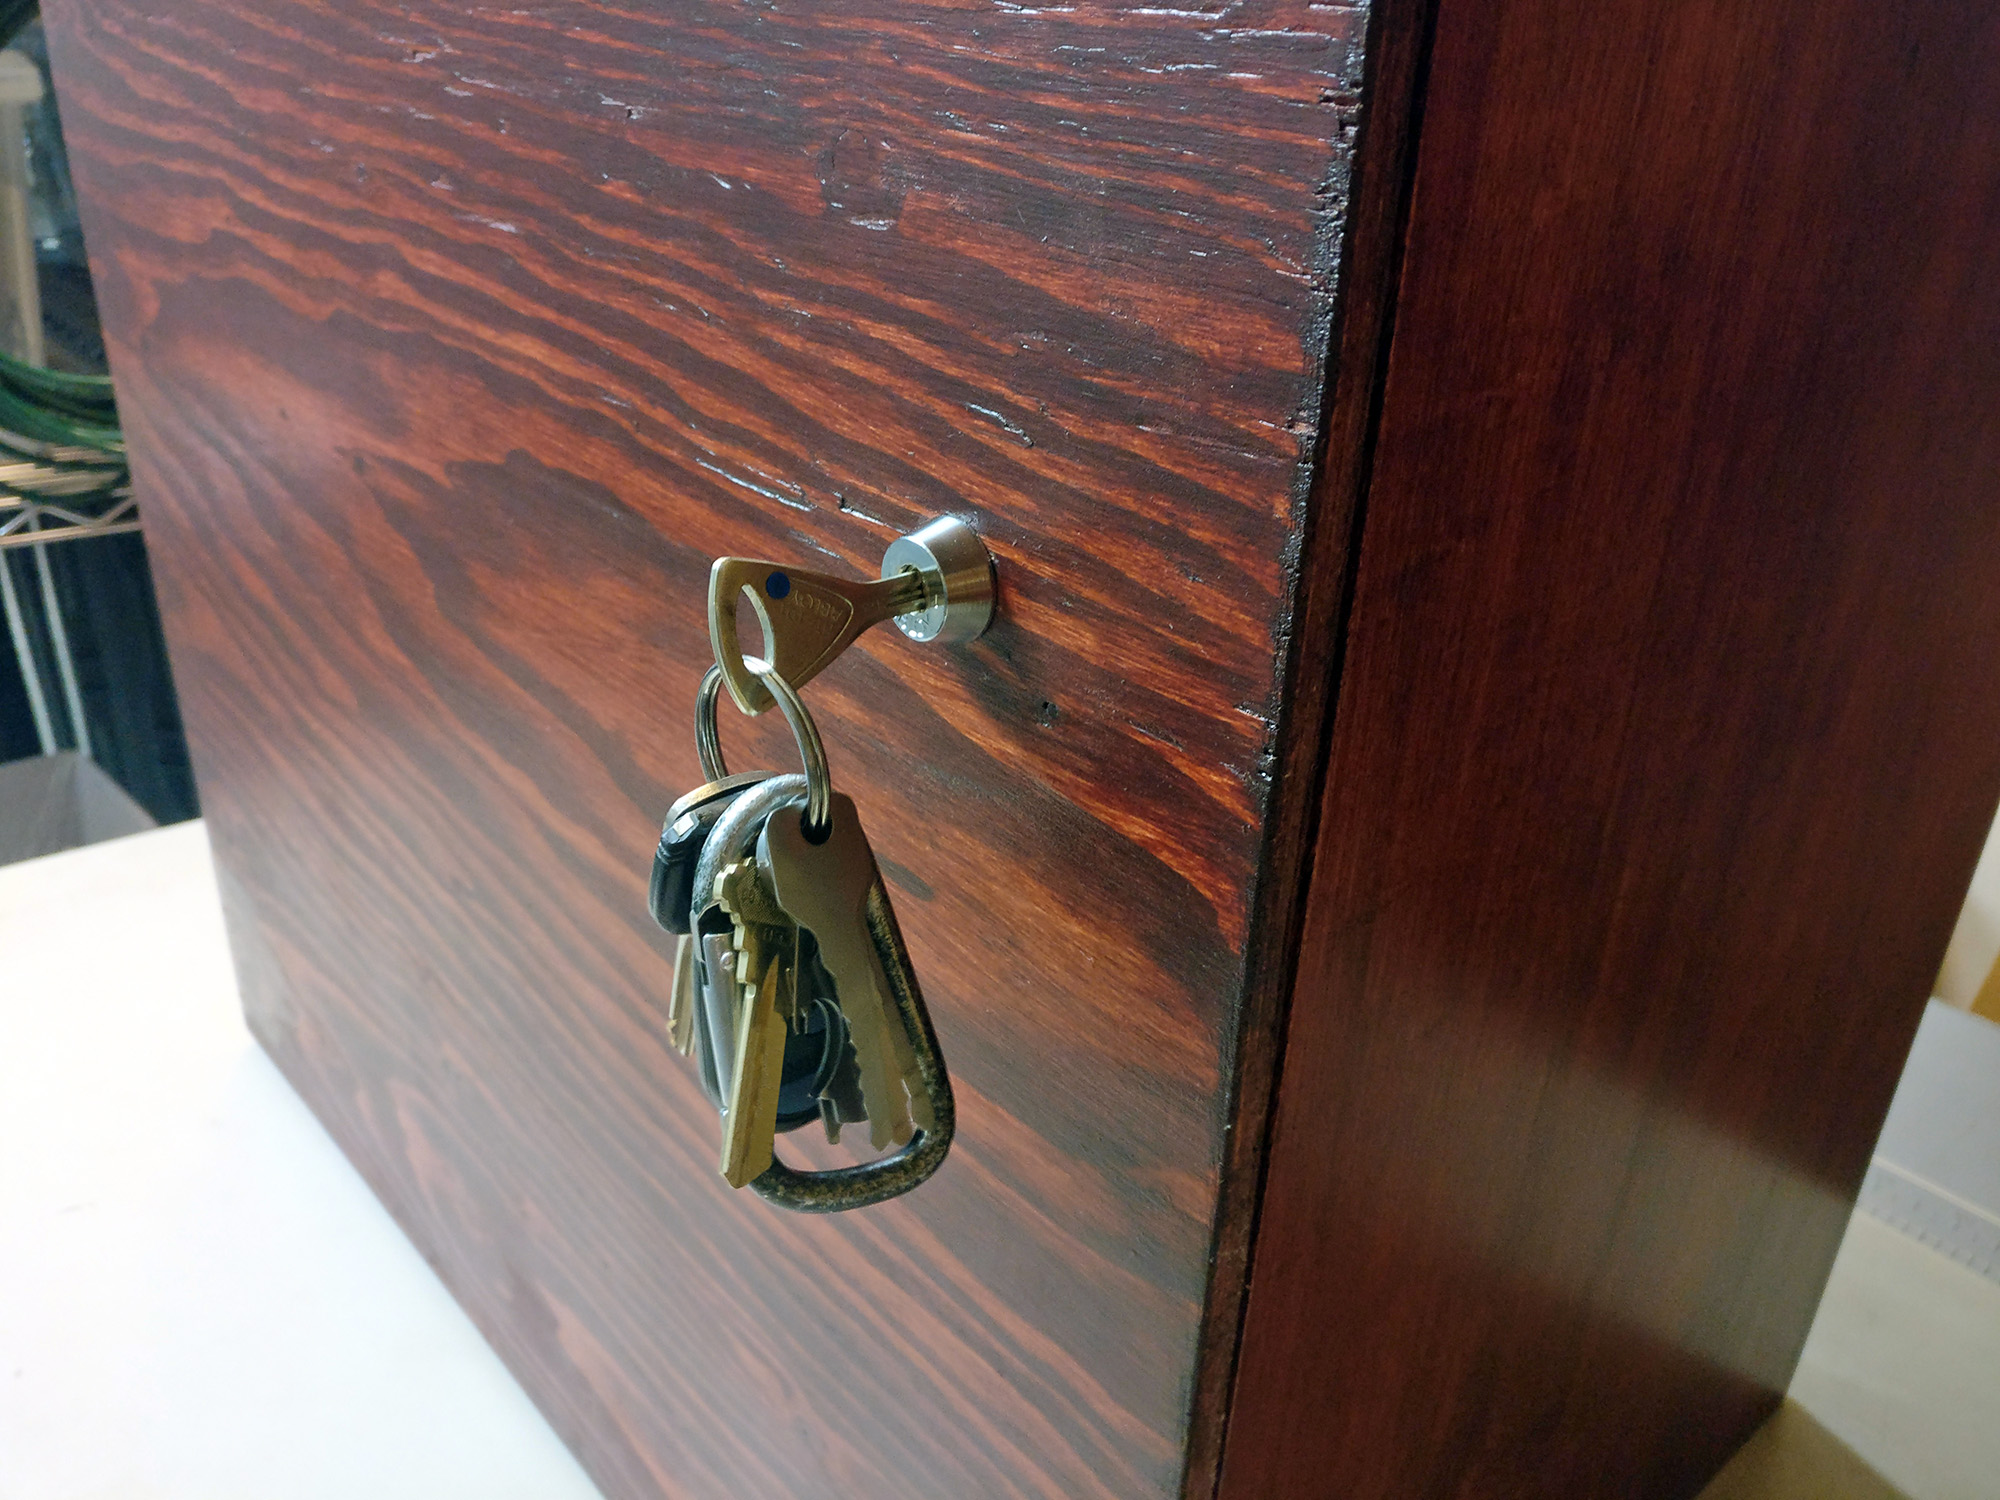
My goal was always to have this piece feature a finished (and enclosed) back. Both for display purposes but also so that it could function as a contest at upcoming events. (You’ll see how… read on!) I pulled an old Abloy Protec cam lock from a previous project box and took some measurements. I then grabbed a 5/8″ Forstner bit and marked the two very close points on the wood where I would drill for a Double-D prep for the cam lock.

It was a perfect fit for the cam lock body… but I still opted to install a metal reinforcing plate anyway. Because if something’s worth doing, it’s worth doing right. (Or, worth over-doing, as some folk say when watching me work. 😉 )


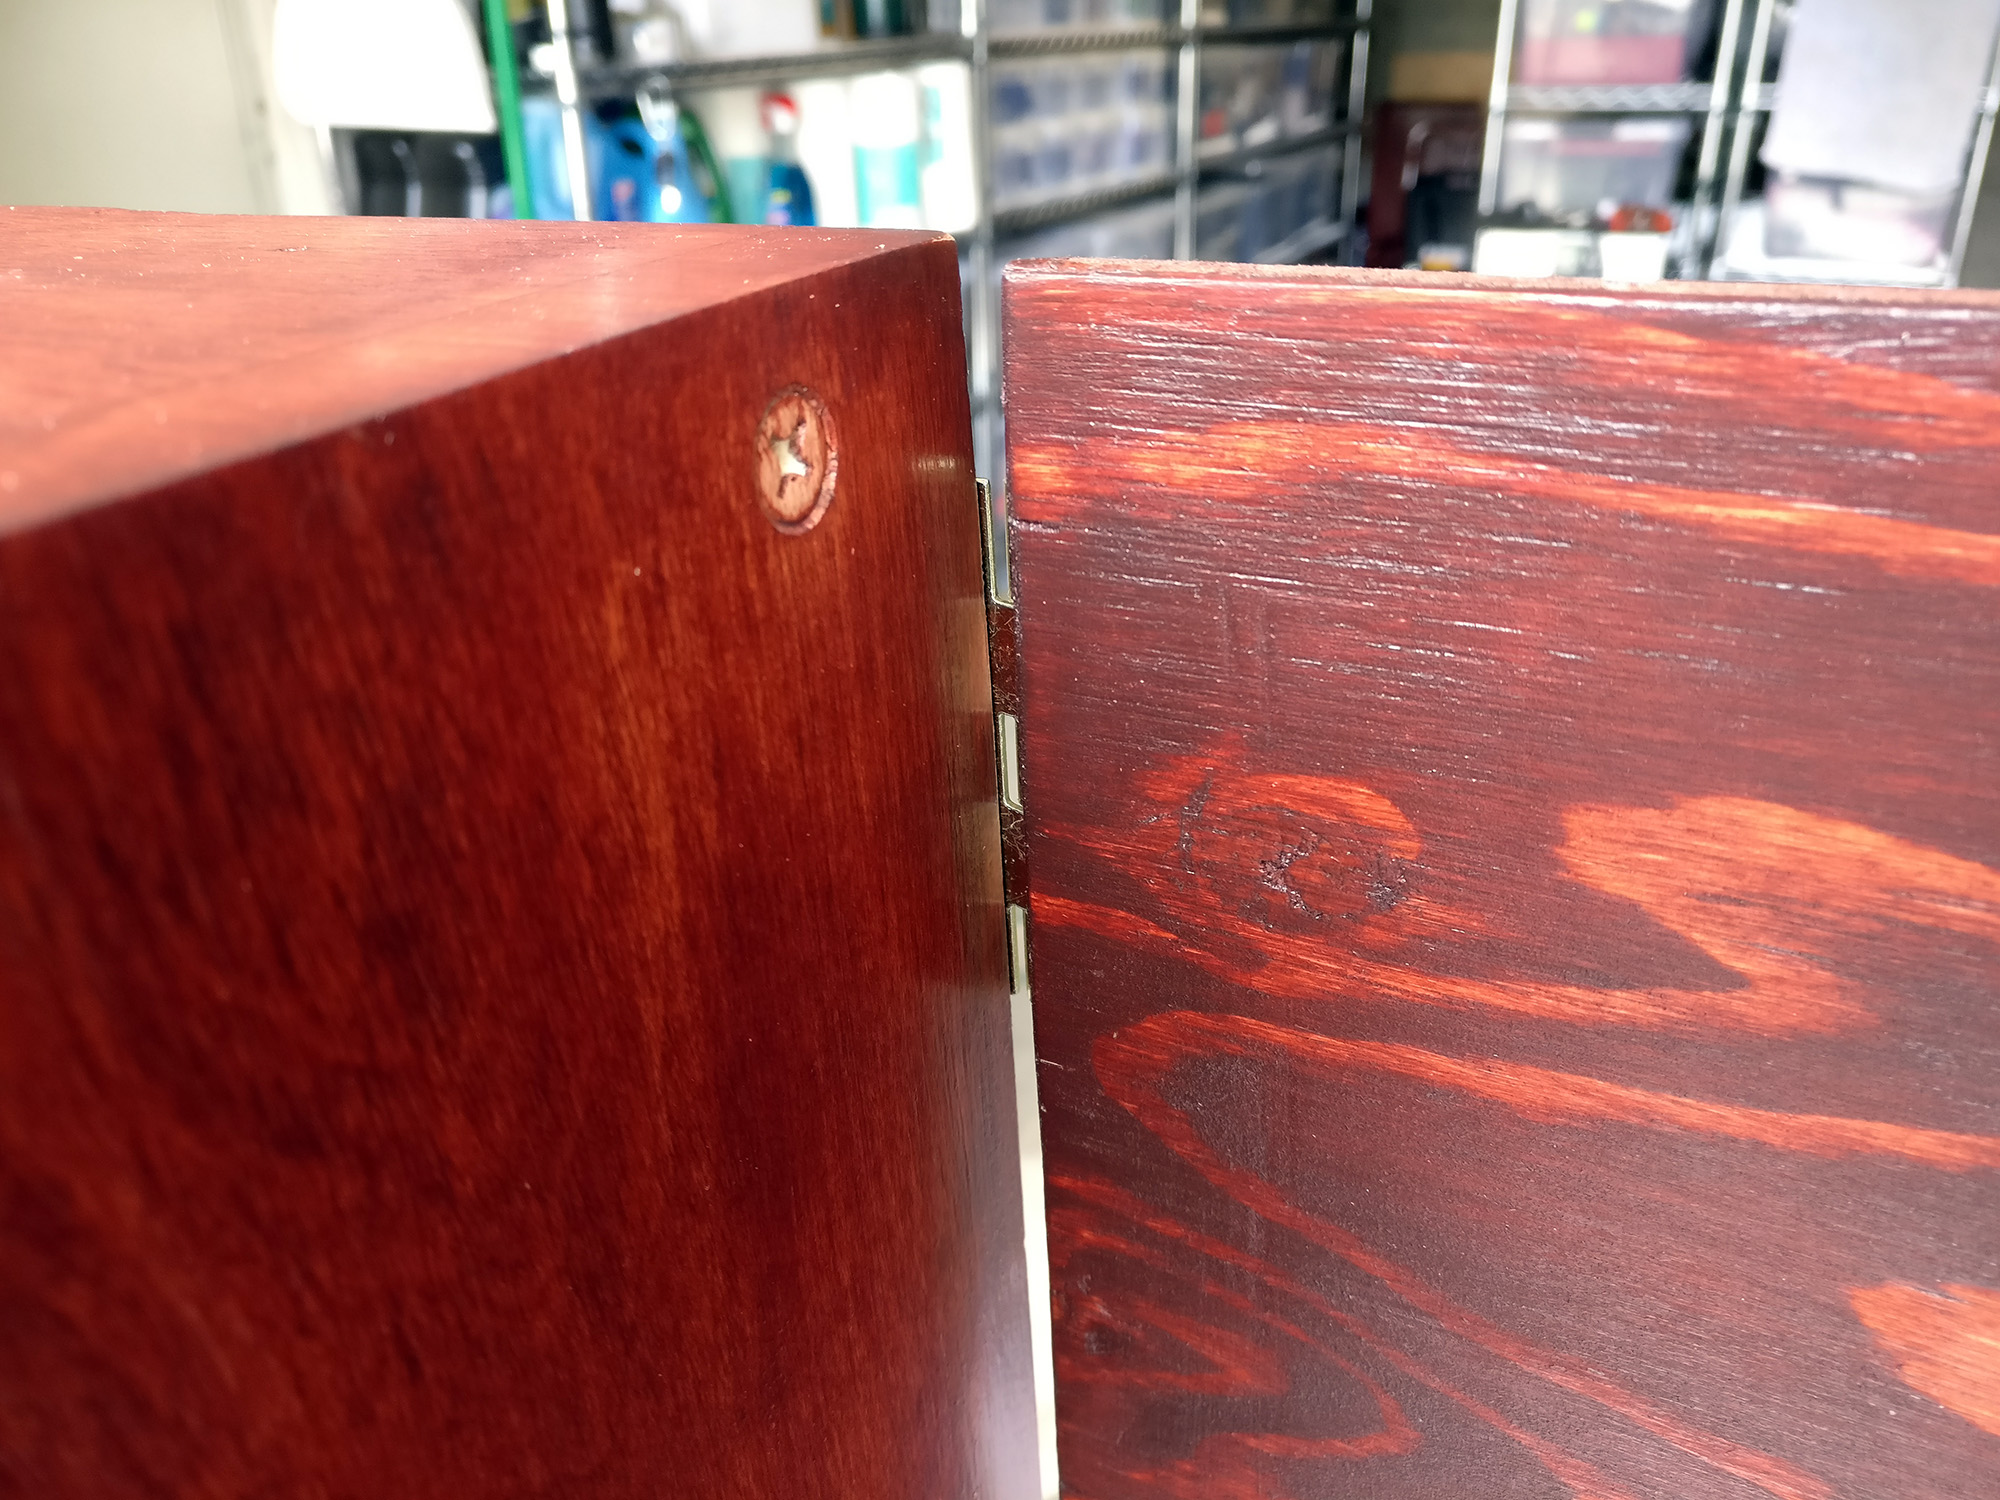
The same care and attention was taken when mounting the hinges and hanging the back panel door. Precision, careful attention to detail, and pilot holes ensured the wood wouldn’t split and everything would fit perfectly.
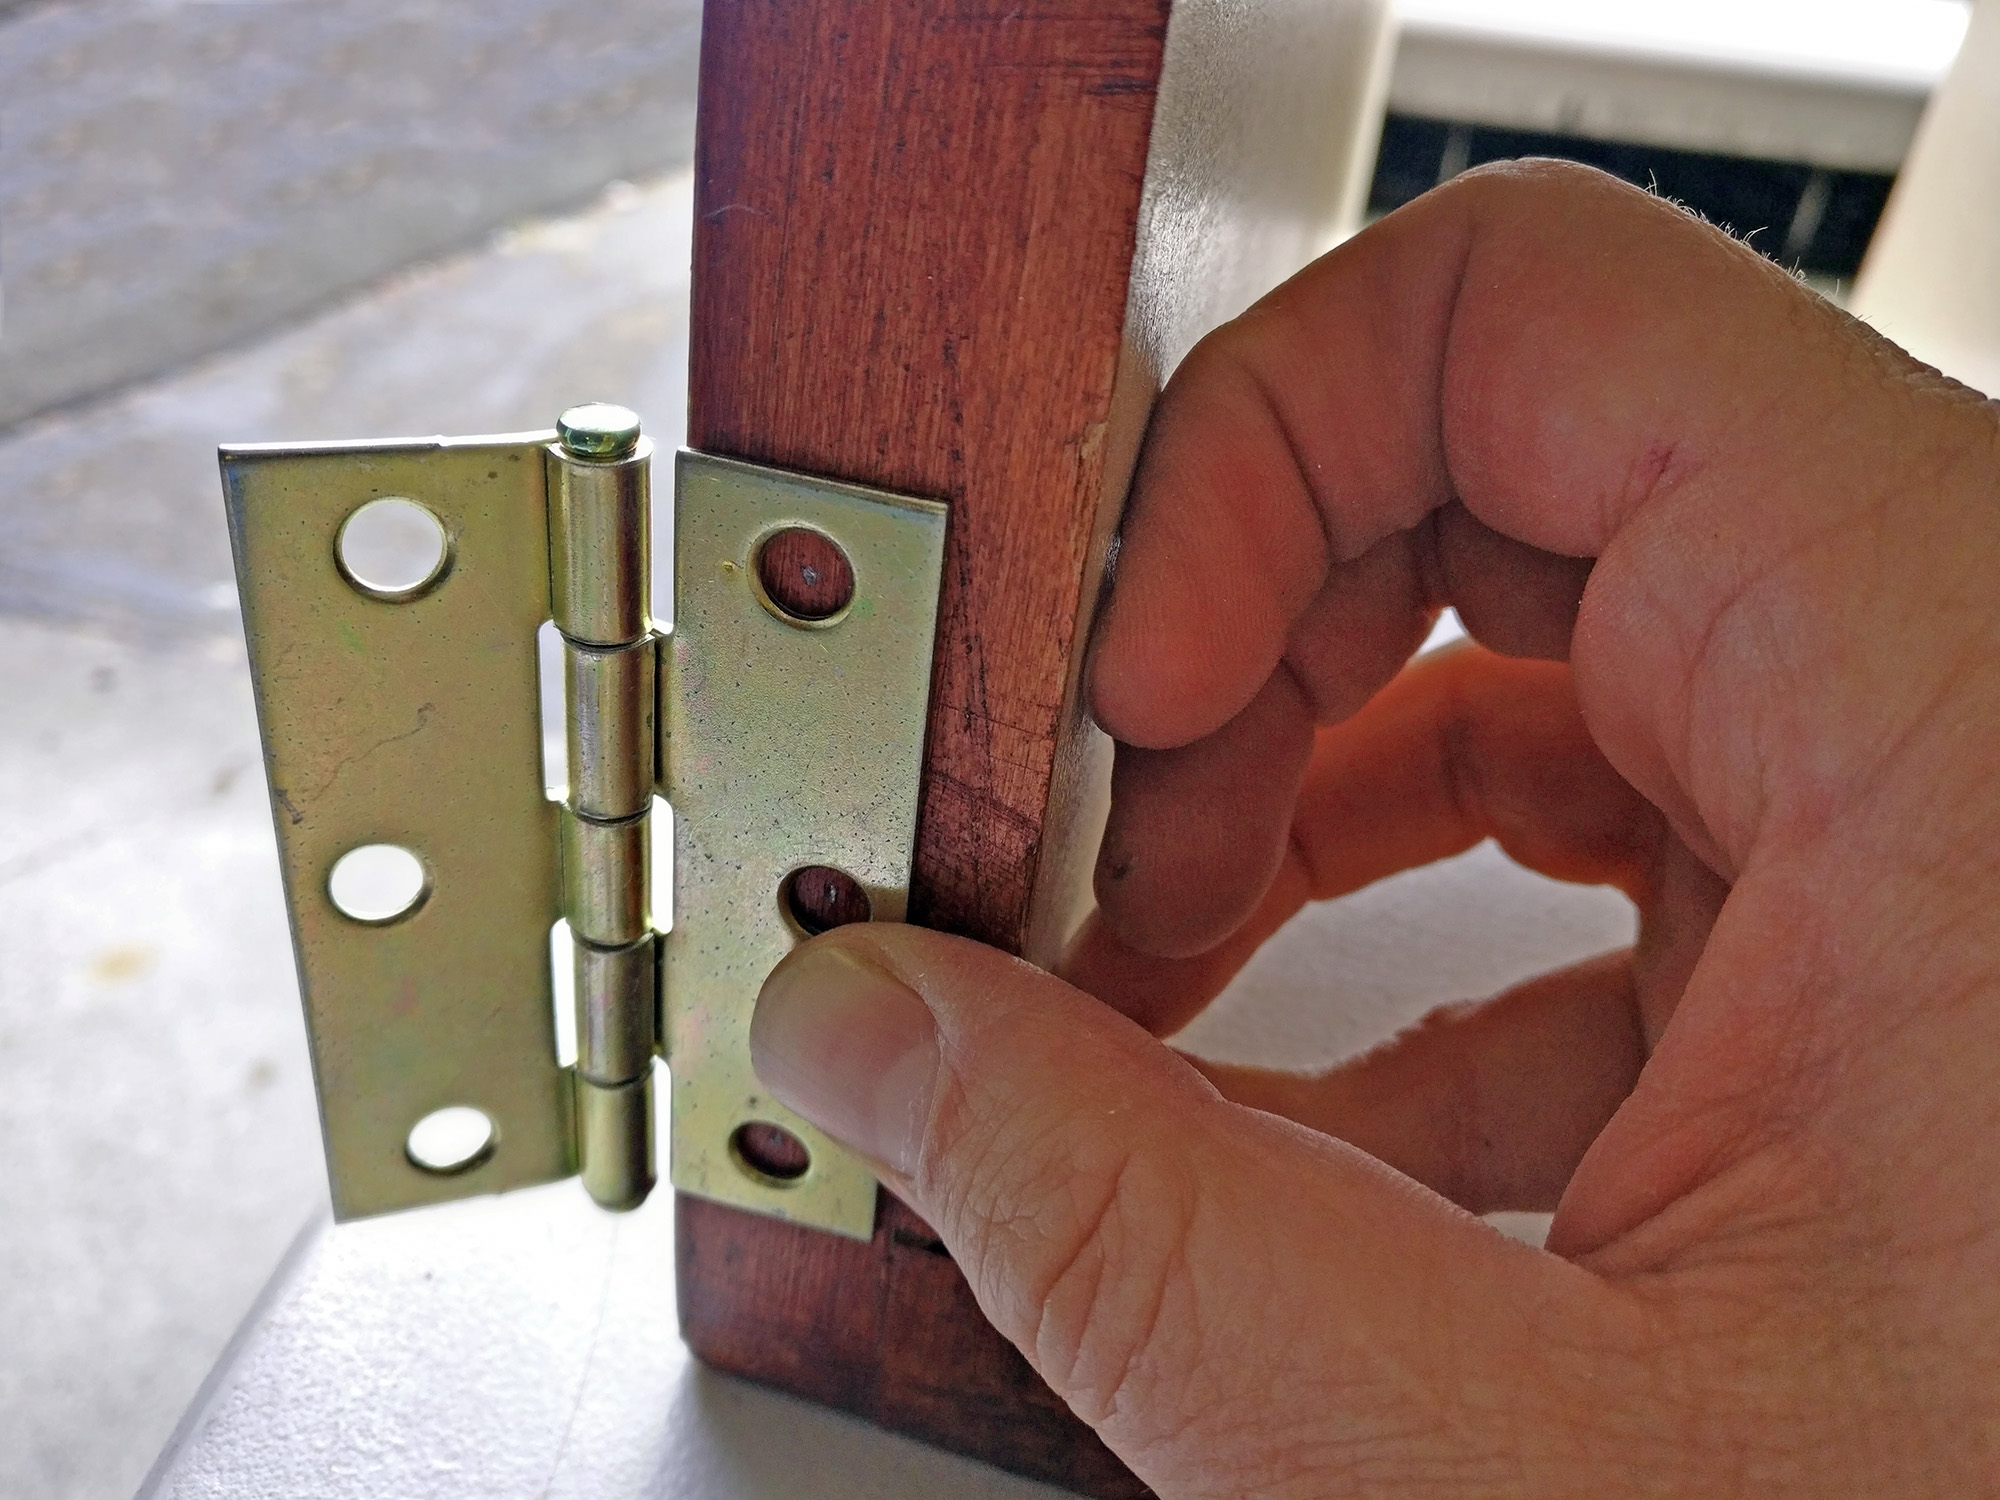

Now, the back panel was only going to be 1/2″ thick (I didn’t have any oak sheets in 3/4″ or 1″ at the time) and the brass screws that came with the hinges would have poked through (always an utterly frustrating thing to happen when you didn’t anticipate that!) so thankfully I saw that coming and took the time to trim down the screws which would drive into the back door.


With everything looking alright, it was time to hang the rear door.

A small metal reinforcing L-plate on the inside was sufficient to engage the Abloy cam with a nice, snug fit when the door is fully closed.


It was now — finally — time to re-install all the brass doors. This was a moment I had really been waiting for, since I wanted very badly to see things all back in their proper place!


I can’t really say how satisfying it was to have this all back together and to see all the keys work as they should, front and back.


And there you have it!

Now, dear friends, our story could have simply ended there. A fun and satisfying restoration project… yes, all well and good. But you may recall that I told you at the outset how I had specifically envisioned a plan for this box back when I spotted it in the antique shop.
Let me first haul the completed unit all the way back up the stairs and place it by my bar so I can tell you the rest…

You see, from the outset, I thought that this would likely make an ideal bottle rack.

But my wife (even back when I first discussed the idea, as we were riding the ferry back from Port Townsend) knew better. While this is a very cool idea for a wine and whisky storage solution, it is not nearly as practical as our wall-mounted rack for the former and my bar shelves for the latter. The post box, quite frankly, doesn’t display enough of the bottles to allow easy selection. The little windows merely show just enough to tantalize but not quite enough to actually inform someone.

But what if the aim was not to give someone the whole picture? What if we want to tantalize and entice someone else with the hope of securing a bottle for themselves?
Ladies and Gentlemen, I give you the next lockpicking contest I will have at an upcoming hacker conference: The Booze Box
Remember when I said I planned out the pinning and bitting chart with care? I had a purpose in mind. My plan is to stock this box with an array of 16 different bottles of wine and whisky — with simple, economical delights at the top and progressing to rare red varietals and single malts as one gets further down — and set it out for aspiring lockpickers and drinkers to see what they can open!

If you look through the little window and see a bottle is still present inside… you know no one has yet claimed it. Try to pick the lock… if you get the door open, the bottle is yours!
I hope this all works out. And even during the rest of the year when I’m not displaying this as a contest at hacker events, it will live in our home as a conversation piece and one more in a long line of restored furniture which I enjoy.
So there you have it! I hope that you found this story to be a fun read. May it inspire you to tackle projects of your own.
Go create something wonderful.